01Complete SettingsAdd your profile, hours and booking rules.
02Create servicesSet prices, duration and cleanup time.
03Add your teamChoose services and planned time off.
04Share your pageSend clients your public booking link.
01 · GETTING STARTED
Your first 15 minutes in Kevonia
Finish these tasks before sharing your booking page. They control what clients see and which times they can book.
01
Step 1
Open Settings and complete the salon profile, address, description and image.
02
Step 2
Set opening hours, booking rules and the payment methods you accept.
03
Step 3
Create at least one service, then add team members and assign their services.
04
Step 4
Preview and complete one test booking before sharing your URL.
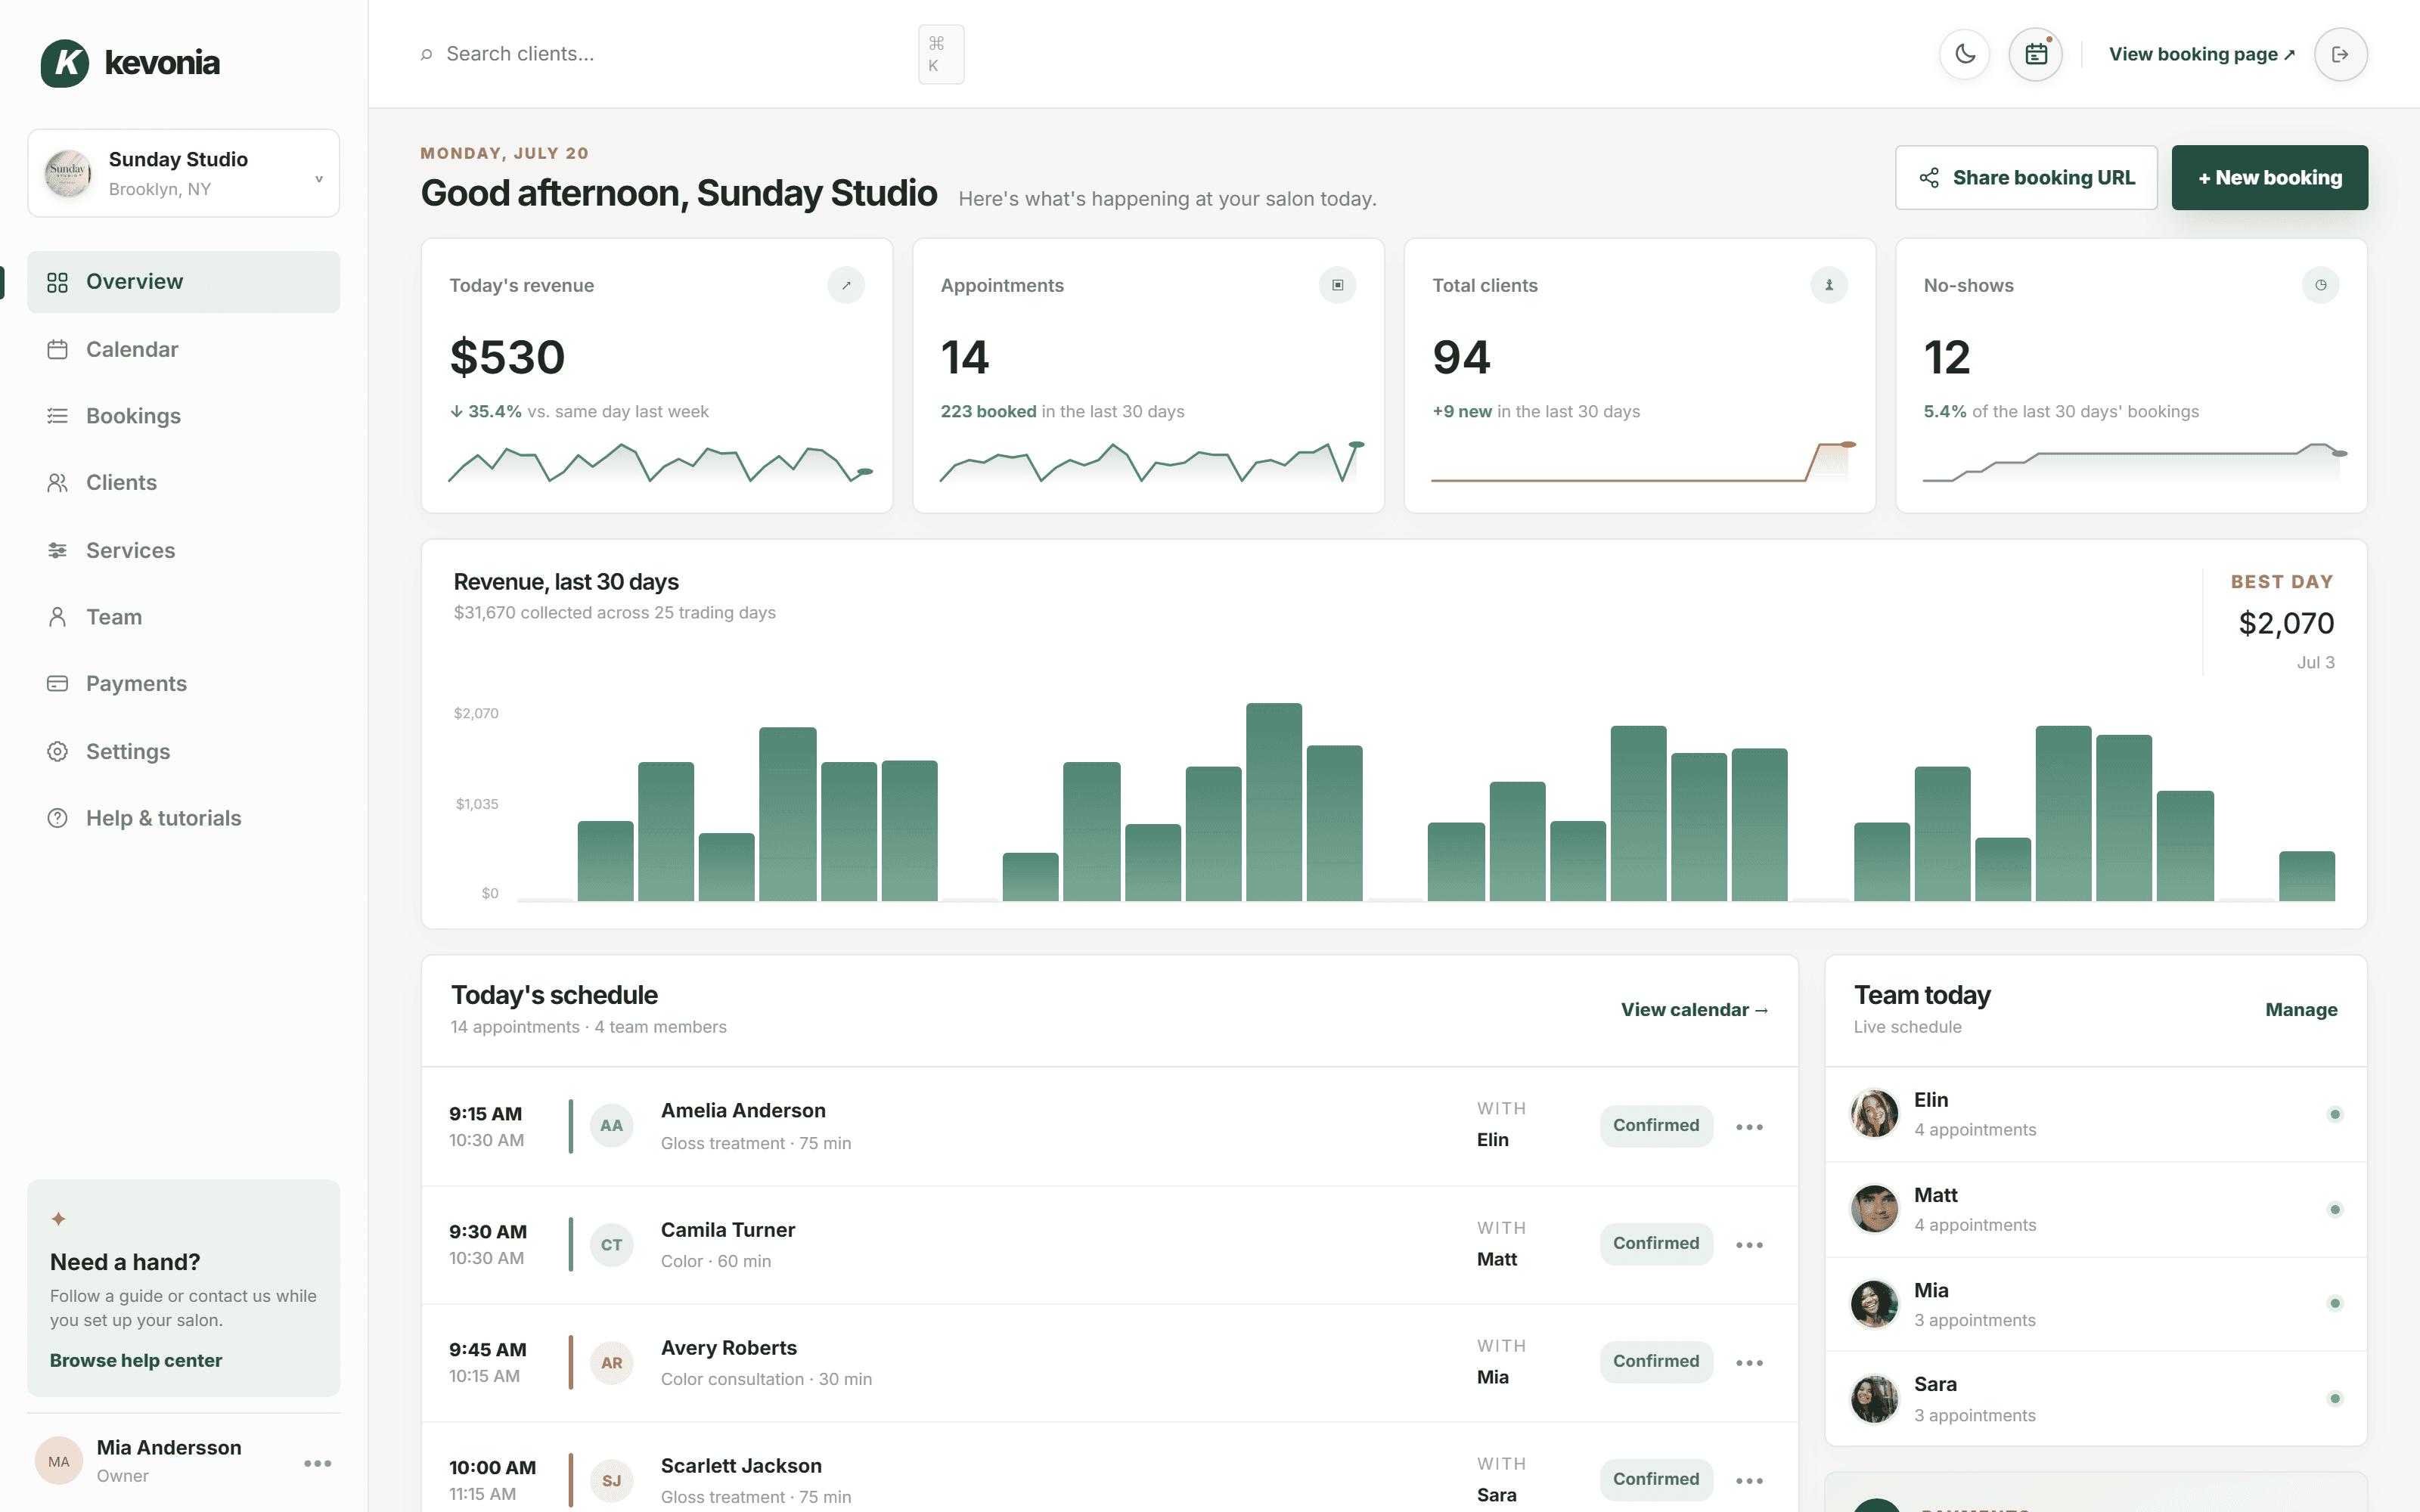
This is the Sunday Studio demo overview. The four cards show today’s revenue, appointments, total clients and no-shows.
Recommended orderSettings → Services → Team → Preview booking page. Availability cannot be accurate until these pieces are connected.
02 · DAILY SCHEDULE
Read and filter the calendar
The calendar combines appointments, opening hours, breaks and team availability in one view.
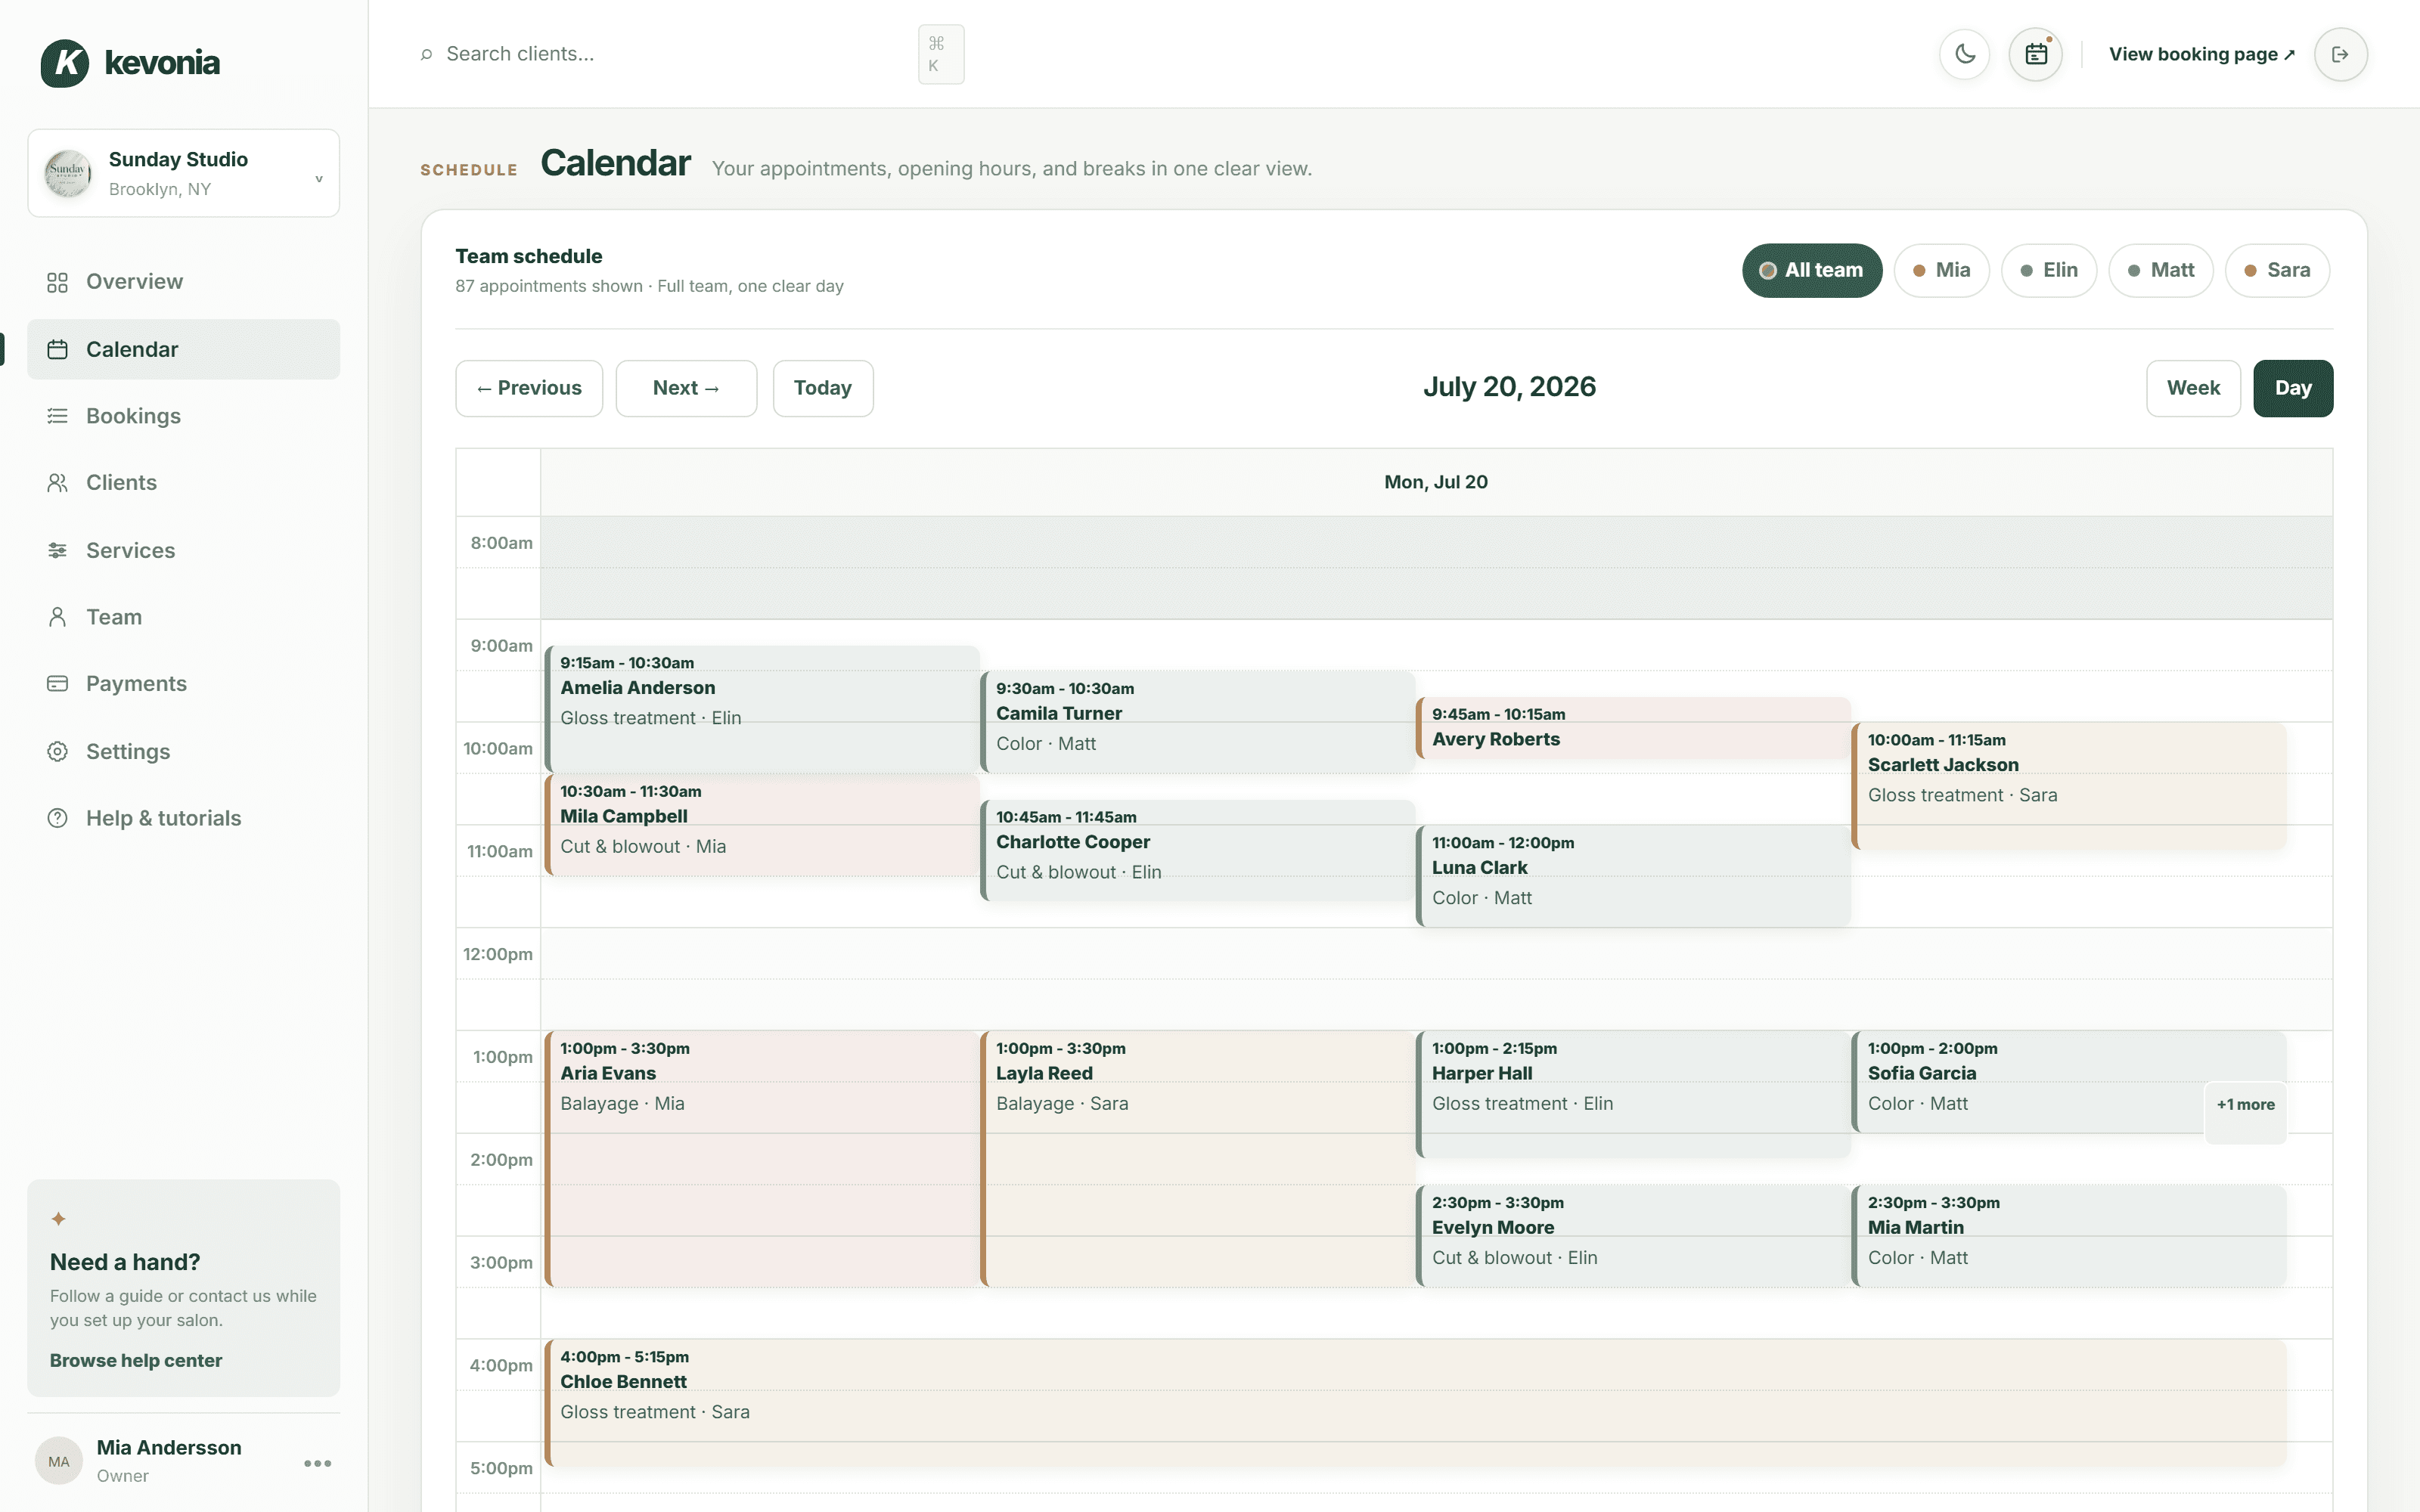
First: see everyoneChoose All team for a complete view of the salon. The professional filters are above the calendar, beside the “Team schedule” heading.
All team shows every professional. On a busy day, appointments can overlap because several people are working at the same time.
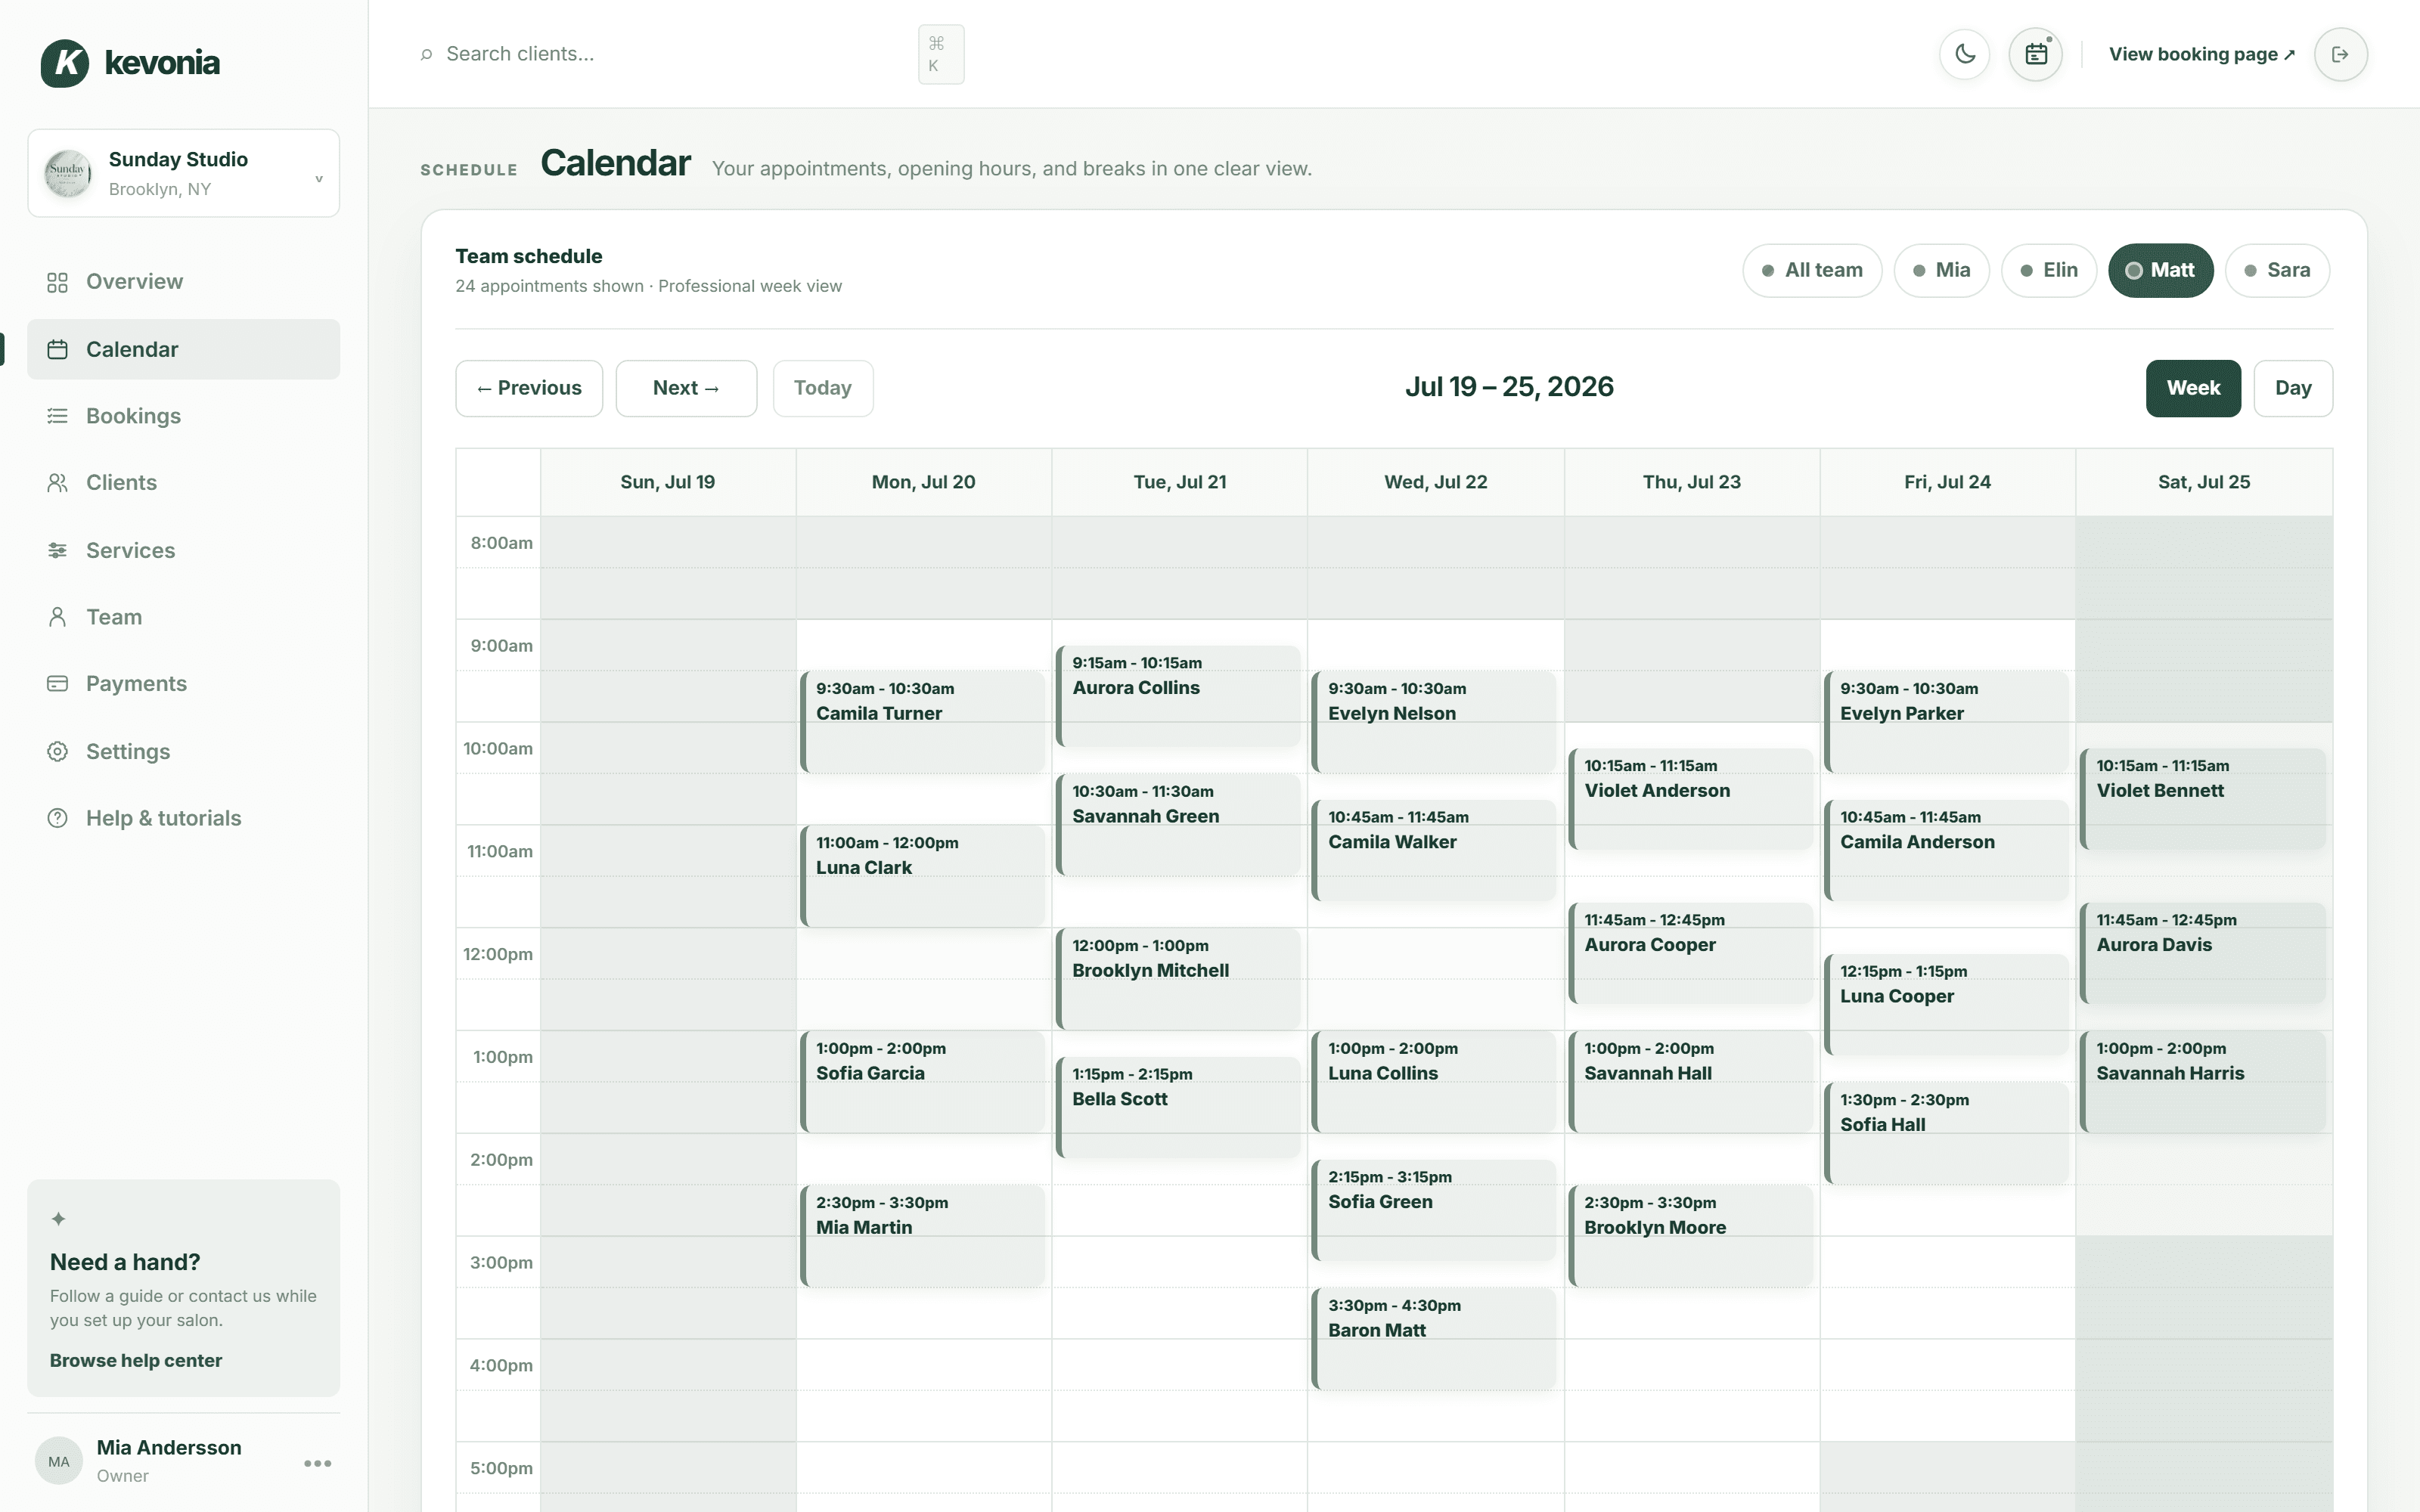
Next: focus on one personClick a name such as Matt in the row above the calendar. Other appointments disappear so the schedule is easier to read.
The selected professional has a highlighted filter button. The calendar now shows only Matt’s bookings and availability.
01
Step 1
Open Calendar from the left menu.
02
Step 2
Choose All team or select one professional from the filter buttons.
03
Step 3
Switch between Week and Day depending on how much detail you need.
04
Step 4
Click an appointment to update the customer, date, time, professional, status or salon notes.
What does “+ more” mean?Several appointments overlap in that row. Select a professional or open Day view to see every appointment clearly.
03 · YOUR PEOPLE
Add a professional and schedule vacation
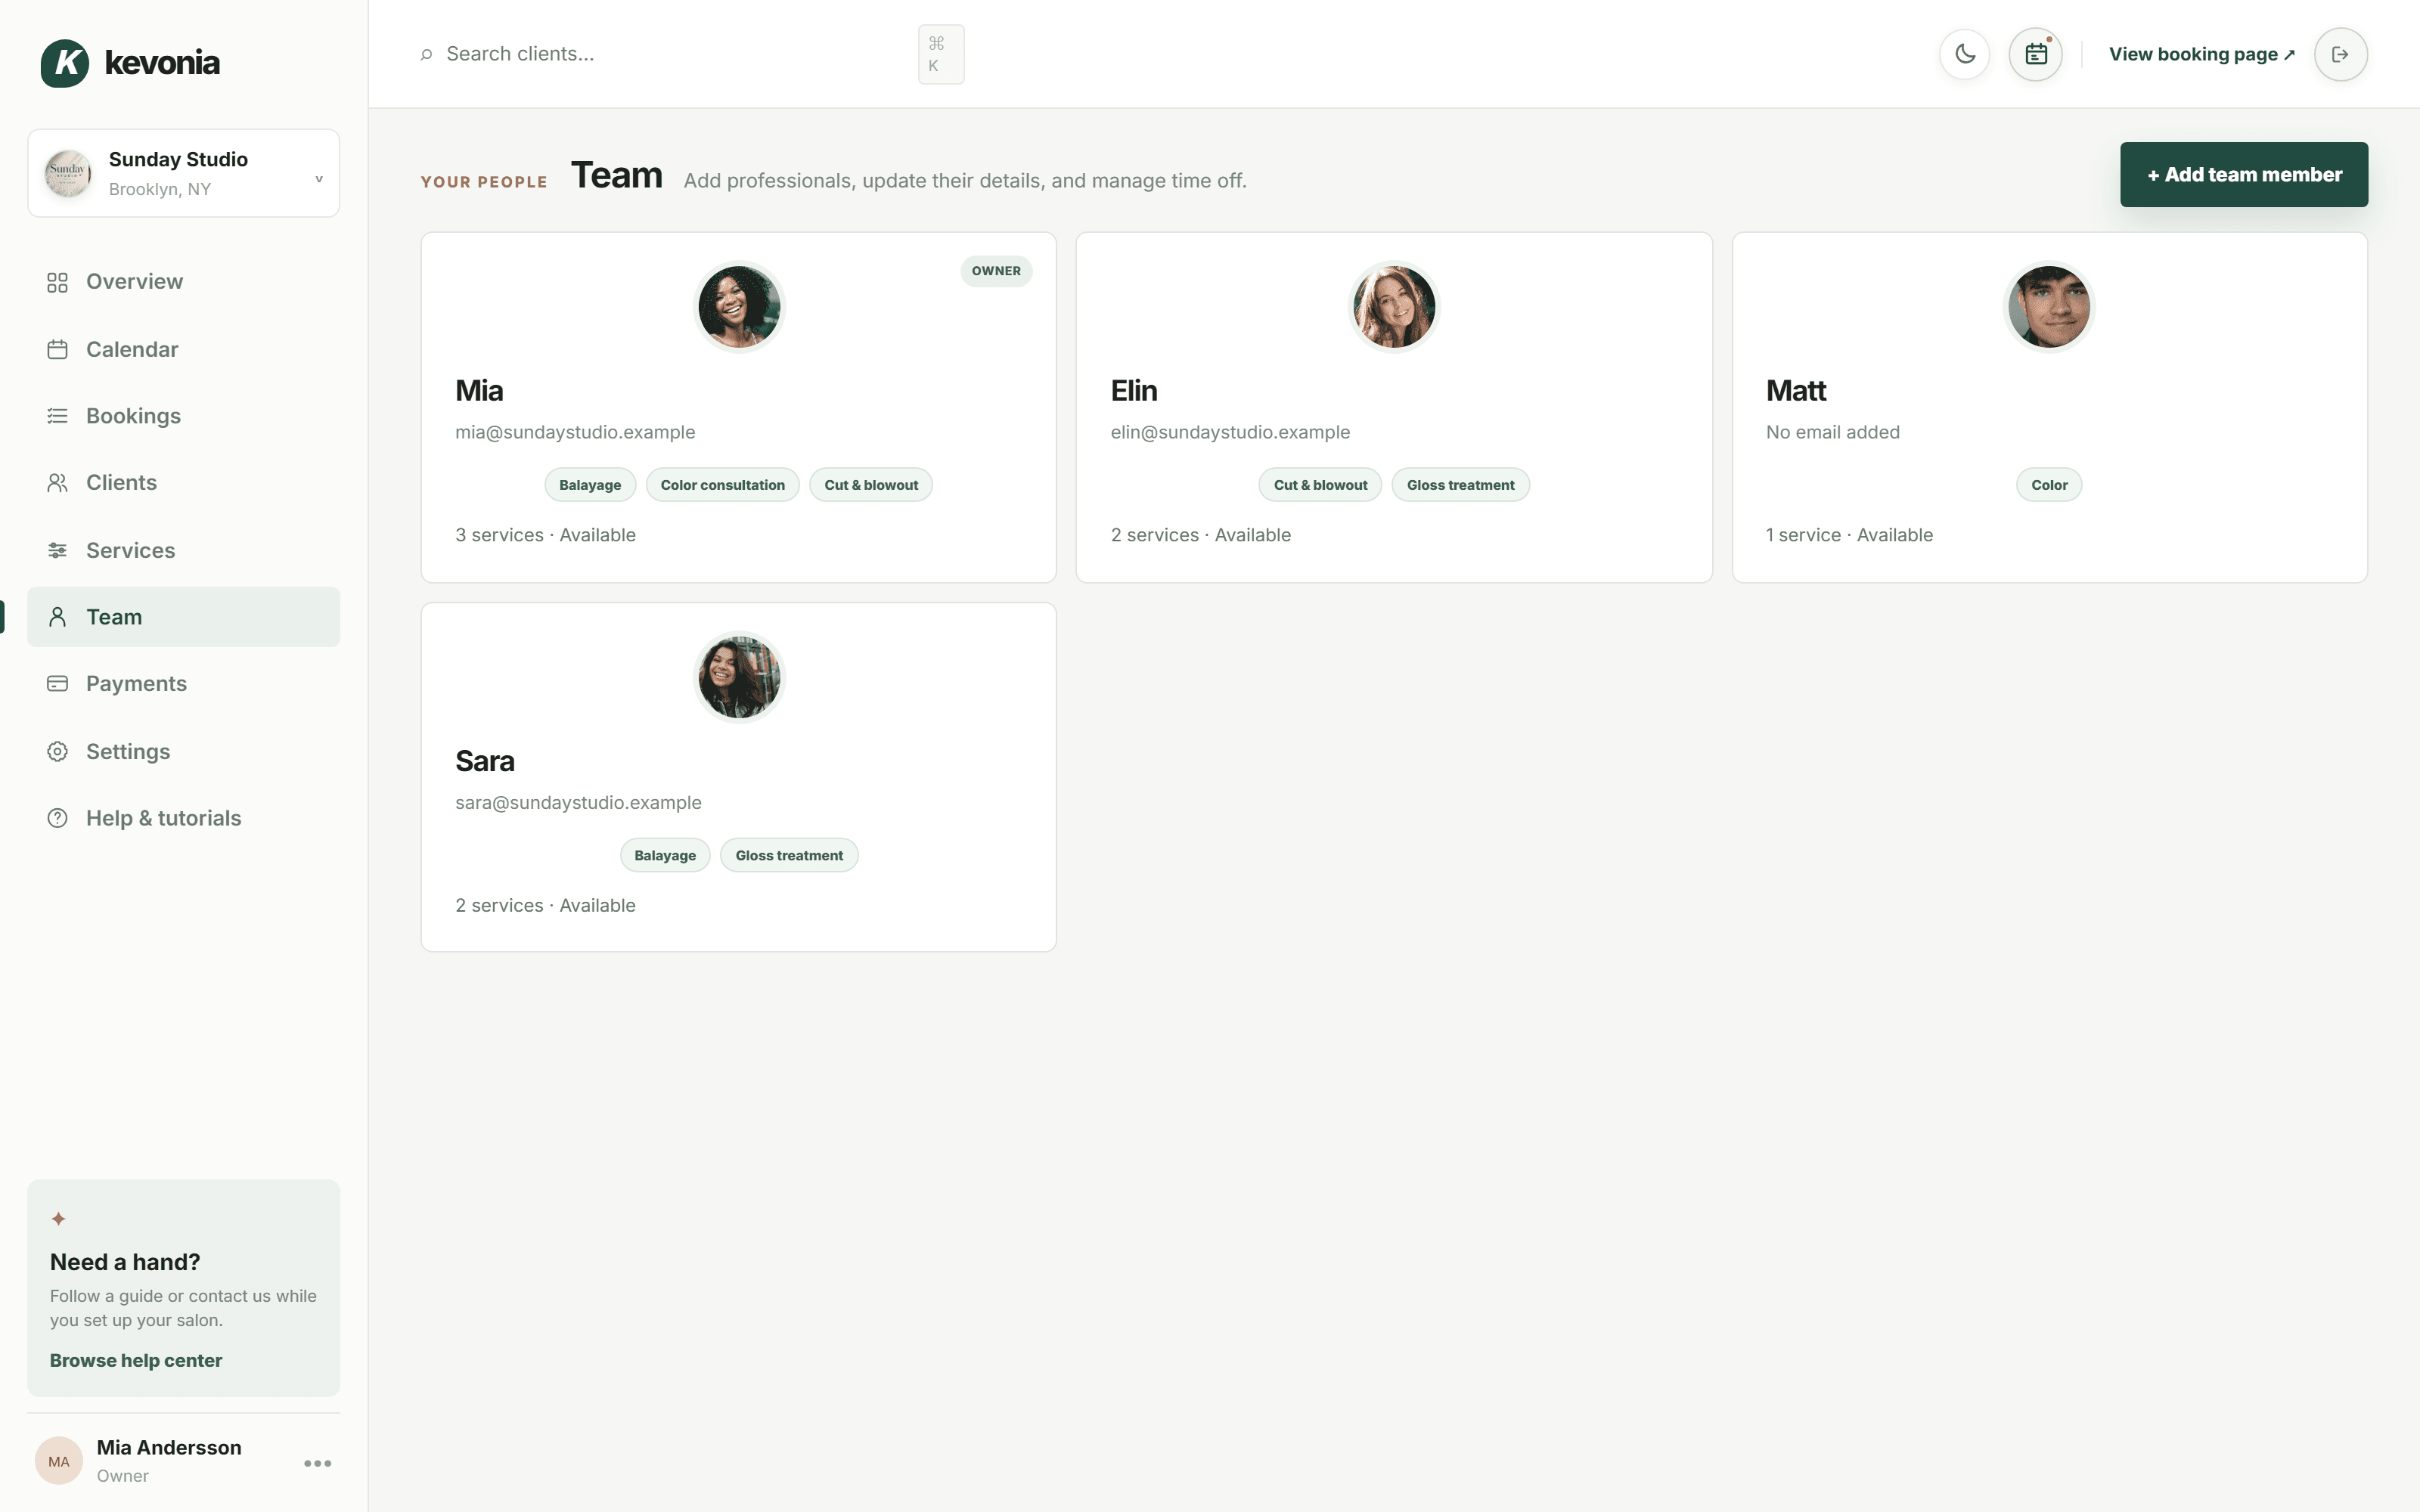
Each team member can have a photo, contact details, color, services and their own periods of unavailability.
Select a team card to edit the professional. Profile photos appear throughout the workspace.
01
Step 1
Open Team and select + Add team member, or click an existing professional.
02
Step 2
Add their name, contact details, calendar color and optional profile photo.
03
Step 3
Check every service this person is qualified to perform.
04
Step 4
Under Availability & time off, select + Add time off, choose the dates, and save the member.
During vacationThe professional becomes unavailable on the public booking page. Move or cancel existing appointments before saving a conflicting absence.
04 · YOUR MENU
Create services and protect cleanup time
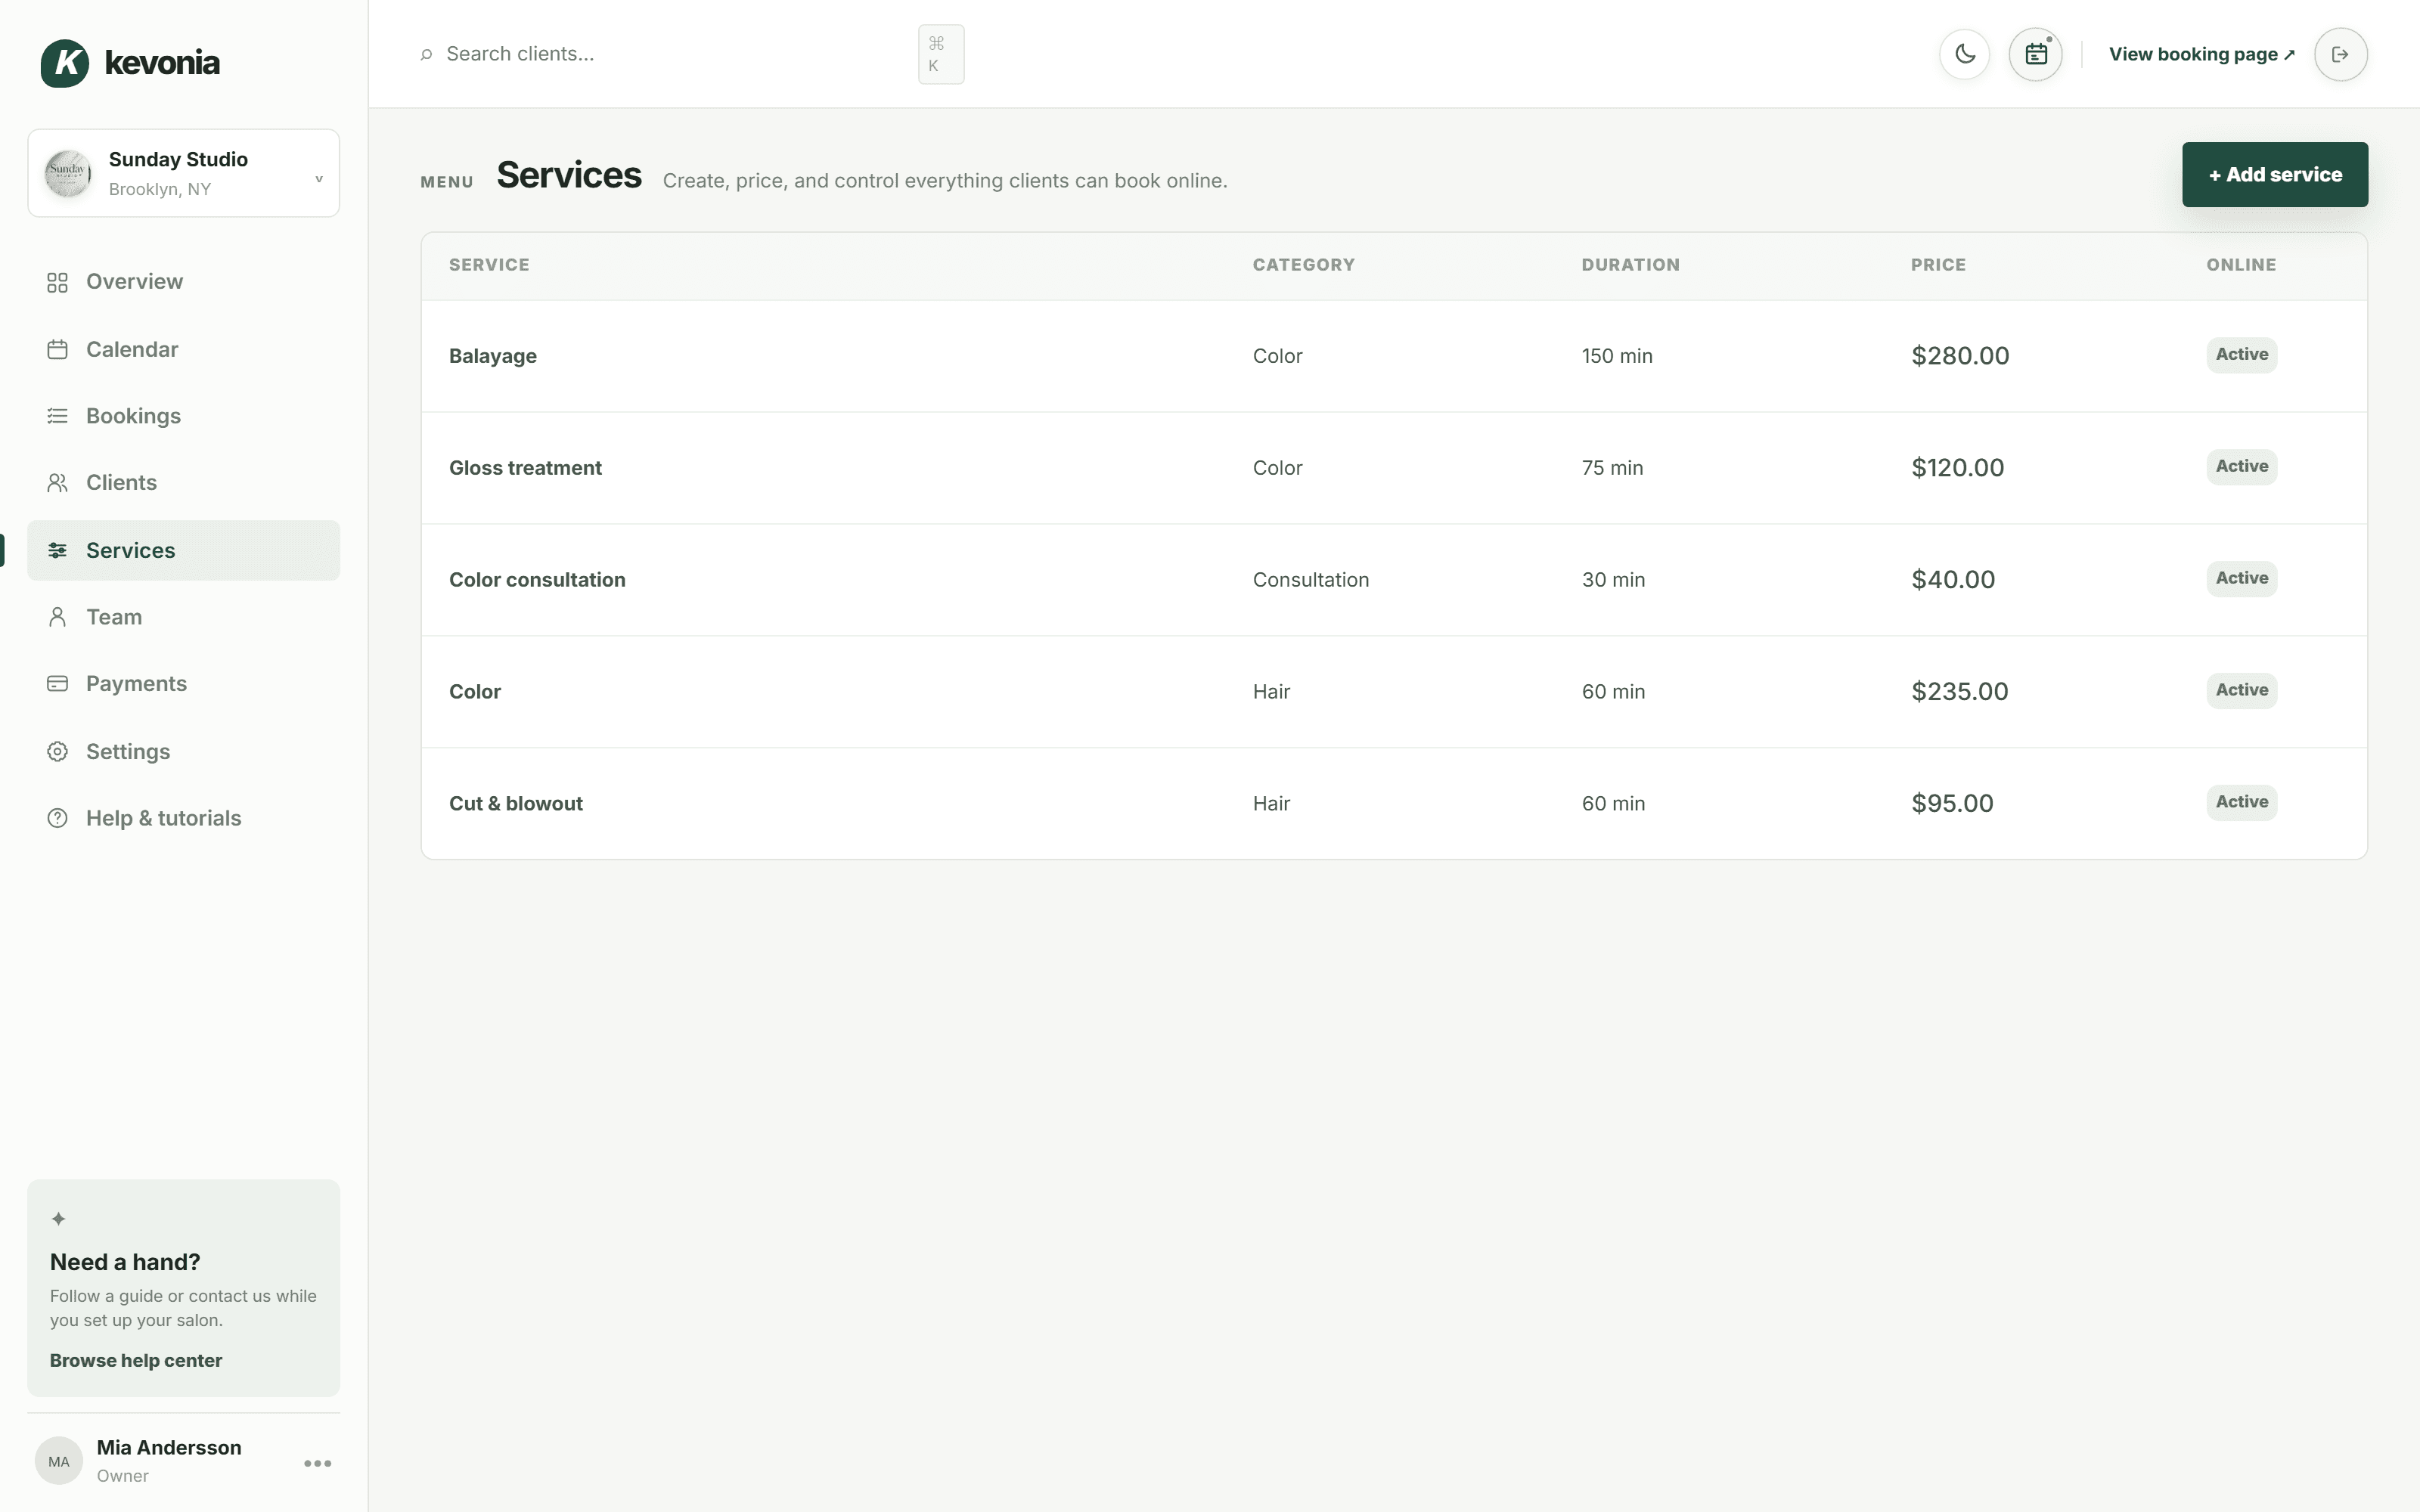
A service controls what the client books, its duration and price, and how much time is blocked afterward.
Service cards make duration, price and online status easy to review.
01
Step 1
Open Services and select + Add service.
02
Step 2
Enter the name, appointment duration, price and description.
03
Step 3
Choose cleanup time when the professional needs a non-bookable buffer afterward.
04
Step 4
Save, then assign the service to the professionals who perform it from Team.
ExampleA 60-minute haircut with 15 minutes of cleanup blocks 75 minutes in the calendar while the client sees a 60-minute service.
05 · APPOINTMENTS
Edit, reschedule or cancel safely
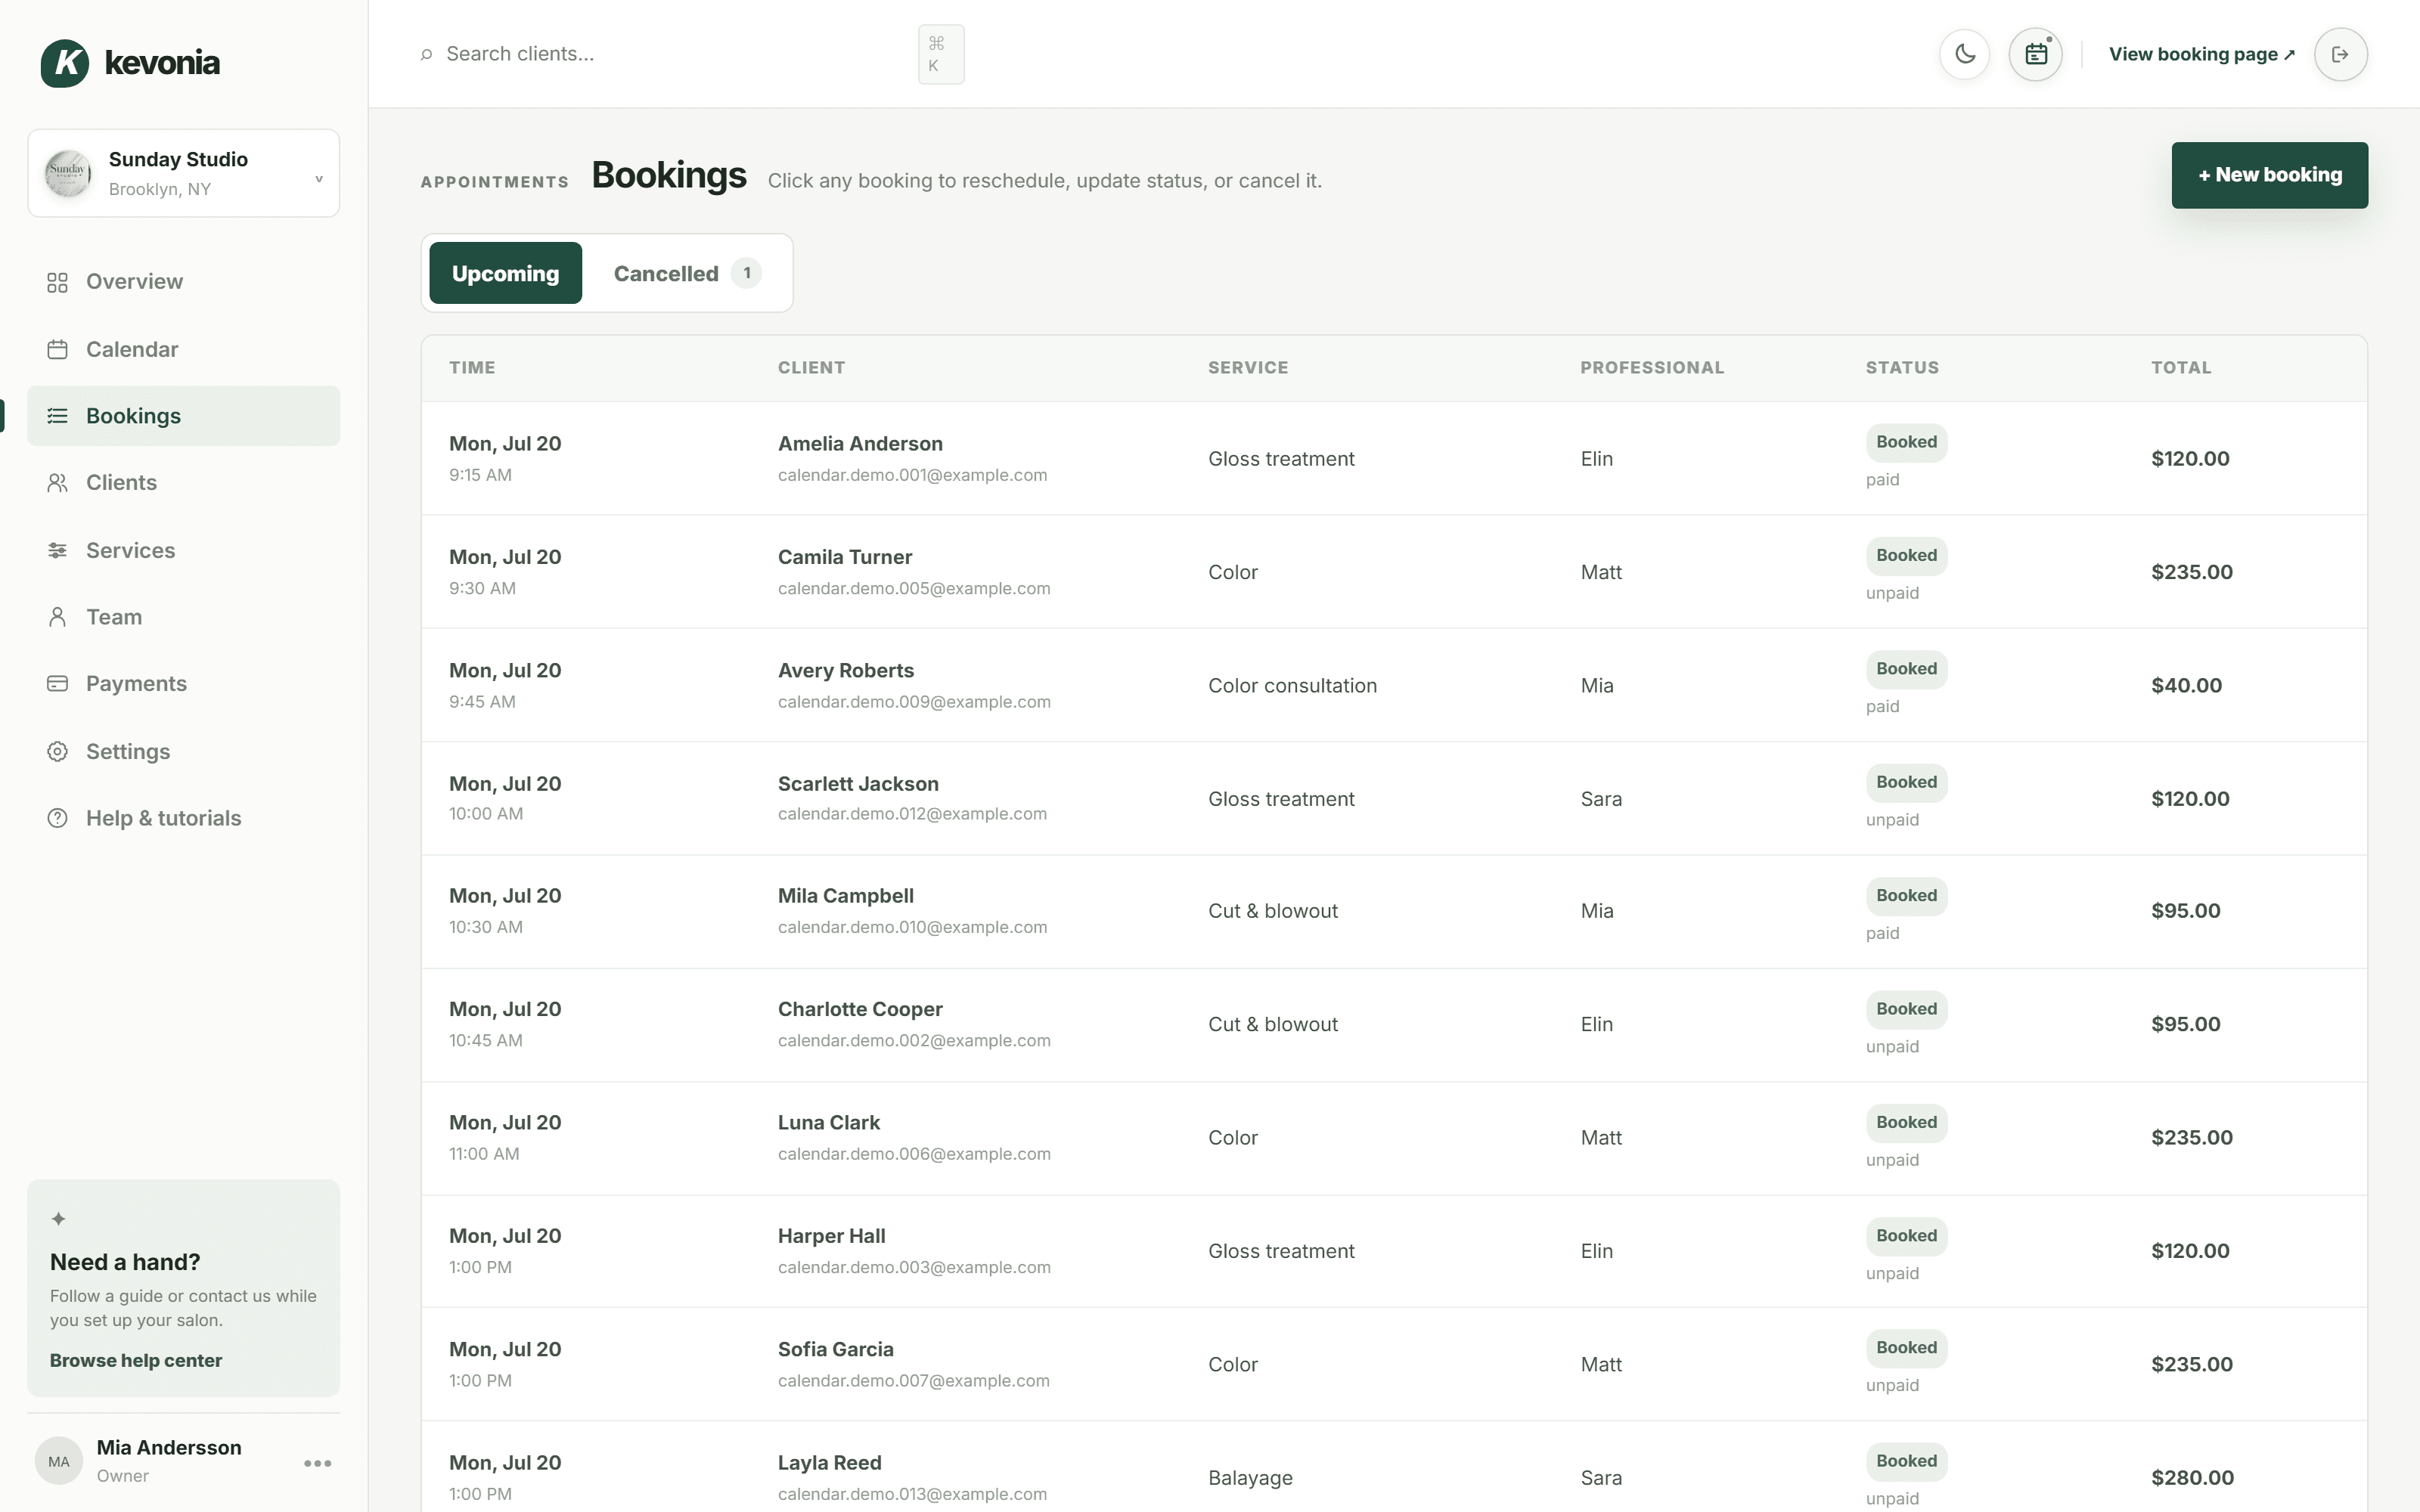
Manage a booking from the Bookings list or by clicking it directly in Calendar.
The booking list keeps time, client, service, professional, status and amount together.
01
Step 1
Click a booking to open its details.
02
Step 2
Update contact information, date, time, professional, status or private notes.
03
Step 3
Kevonia checks that the selected professional is free before saving a new time.
04
Step 4
Choose Cancel booking and confirm. Find the record later under Bookings → Cancelled.
Cancelled times become availableThe history remains searchable, but the original time can immediately be booked by another client.
06 · CLIENT RECORDS
Find and maintain client information
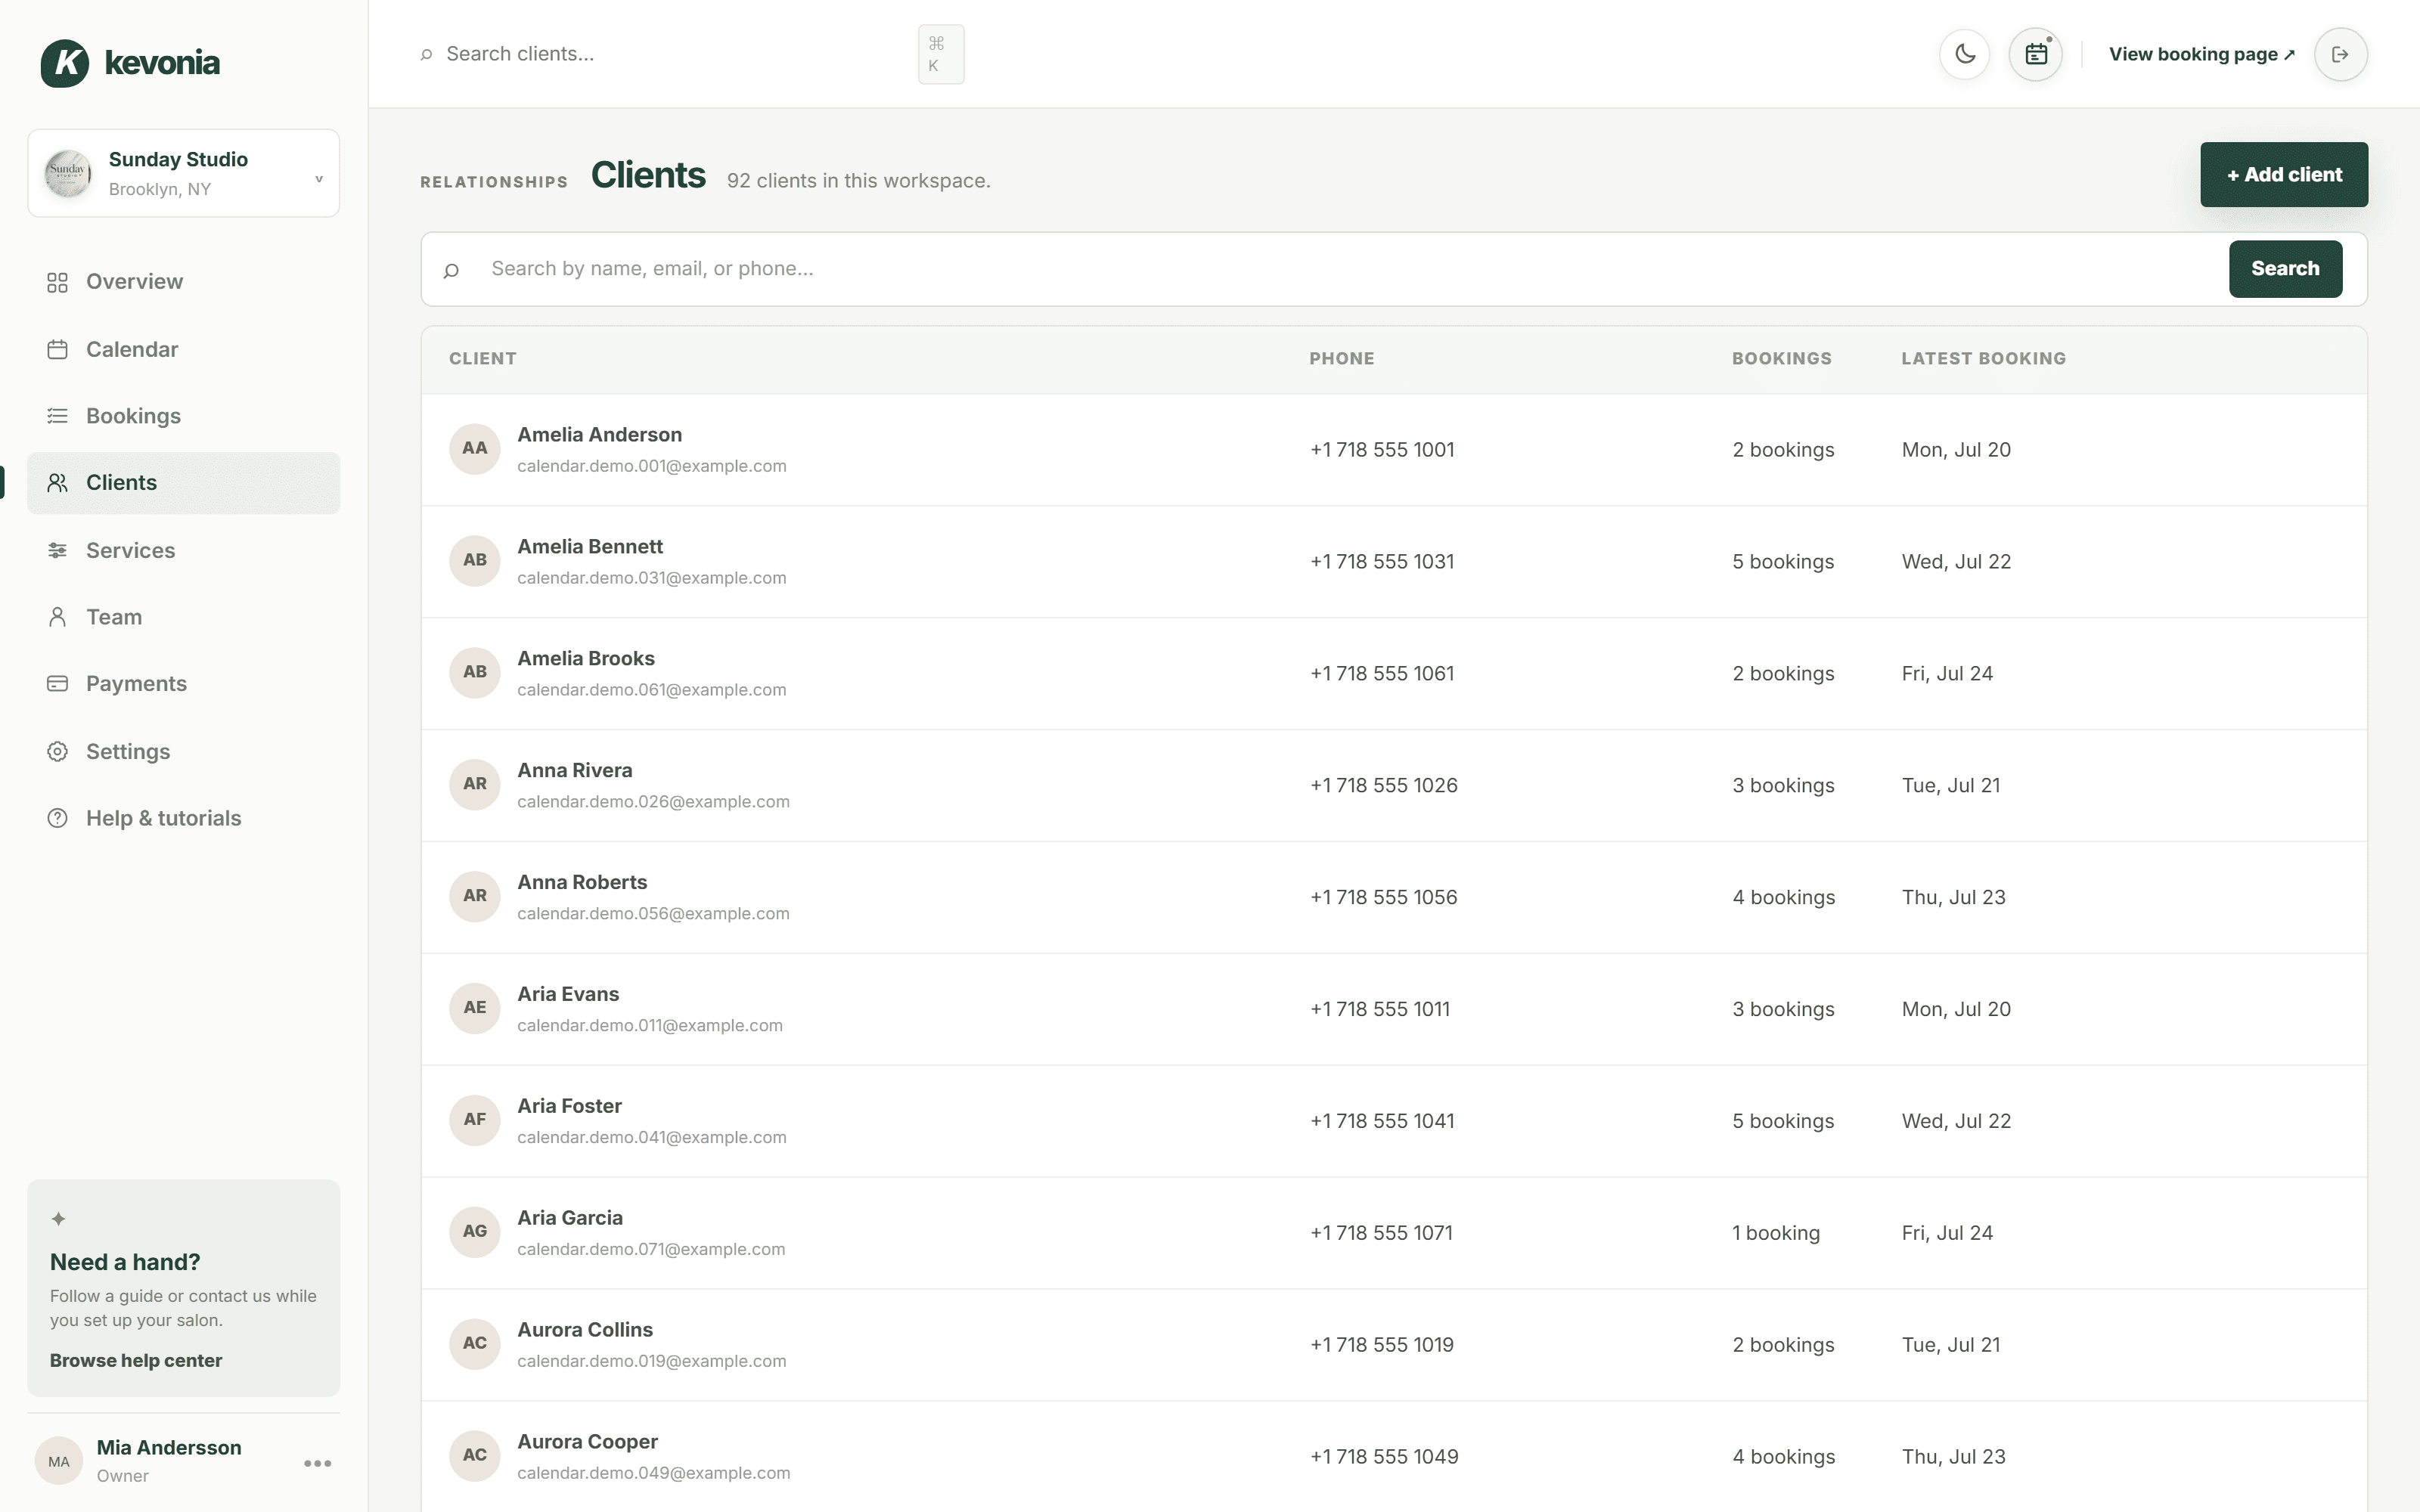
Clients are created during online booking and can also be added manually by the salon.
Search all clients by name, email or phone. Results are paginated for large workspaces.
01
Step 1
Open Clients and search by name, email or phone.
02
Step 2
Select a card to update contact information and private notes.
03
Step 3
Use + Add client when someone contacts the salon before booking.
04
Step 4
Removing a client archives the profile while preserving appointment history.
07 · MONEY
Keep subscriptions and client payouts separate
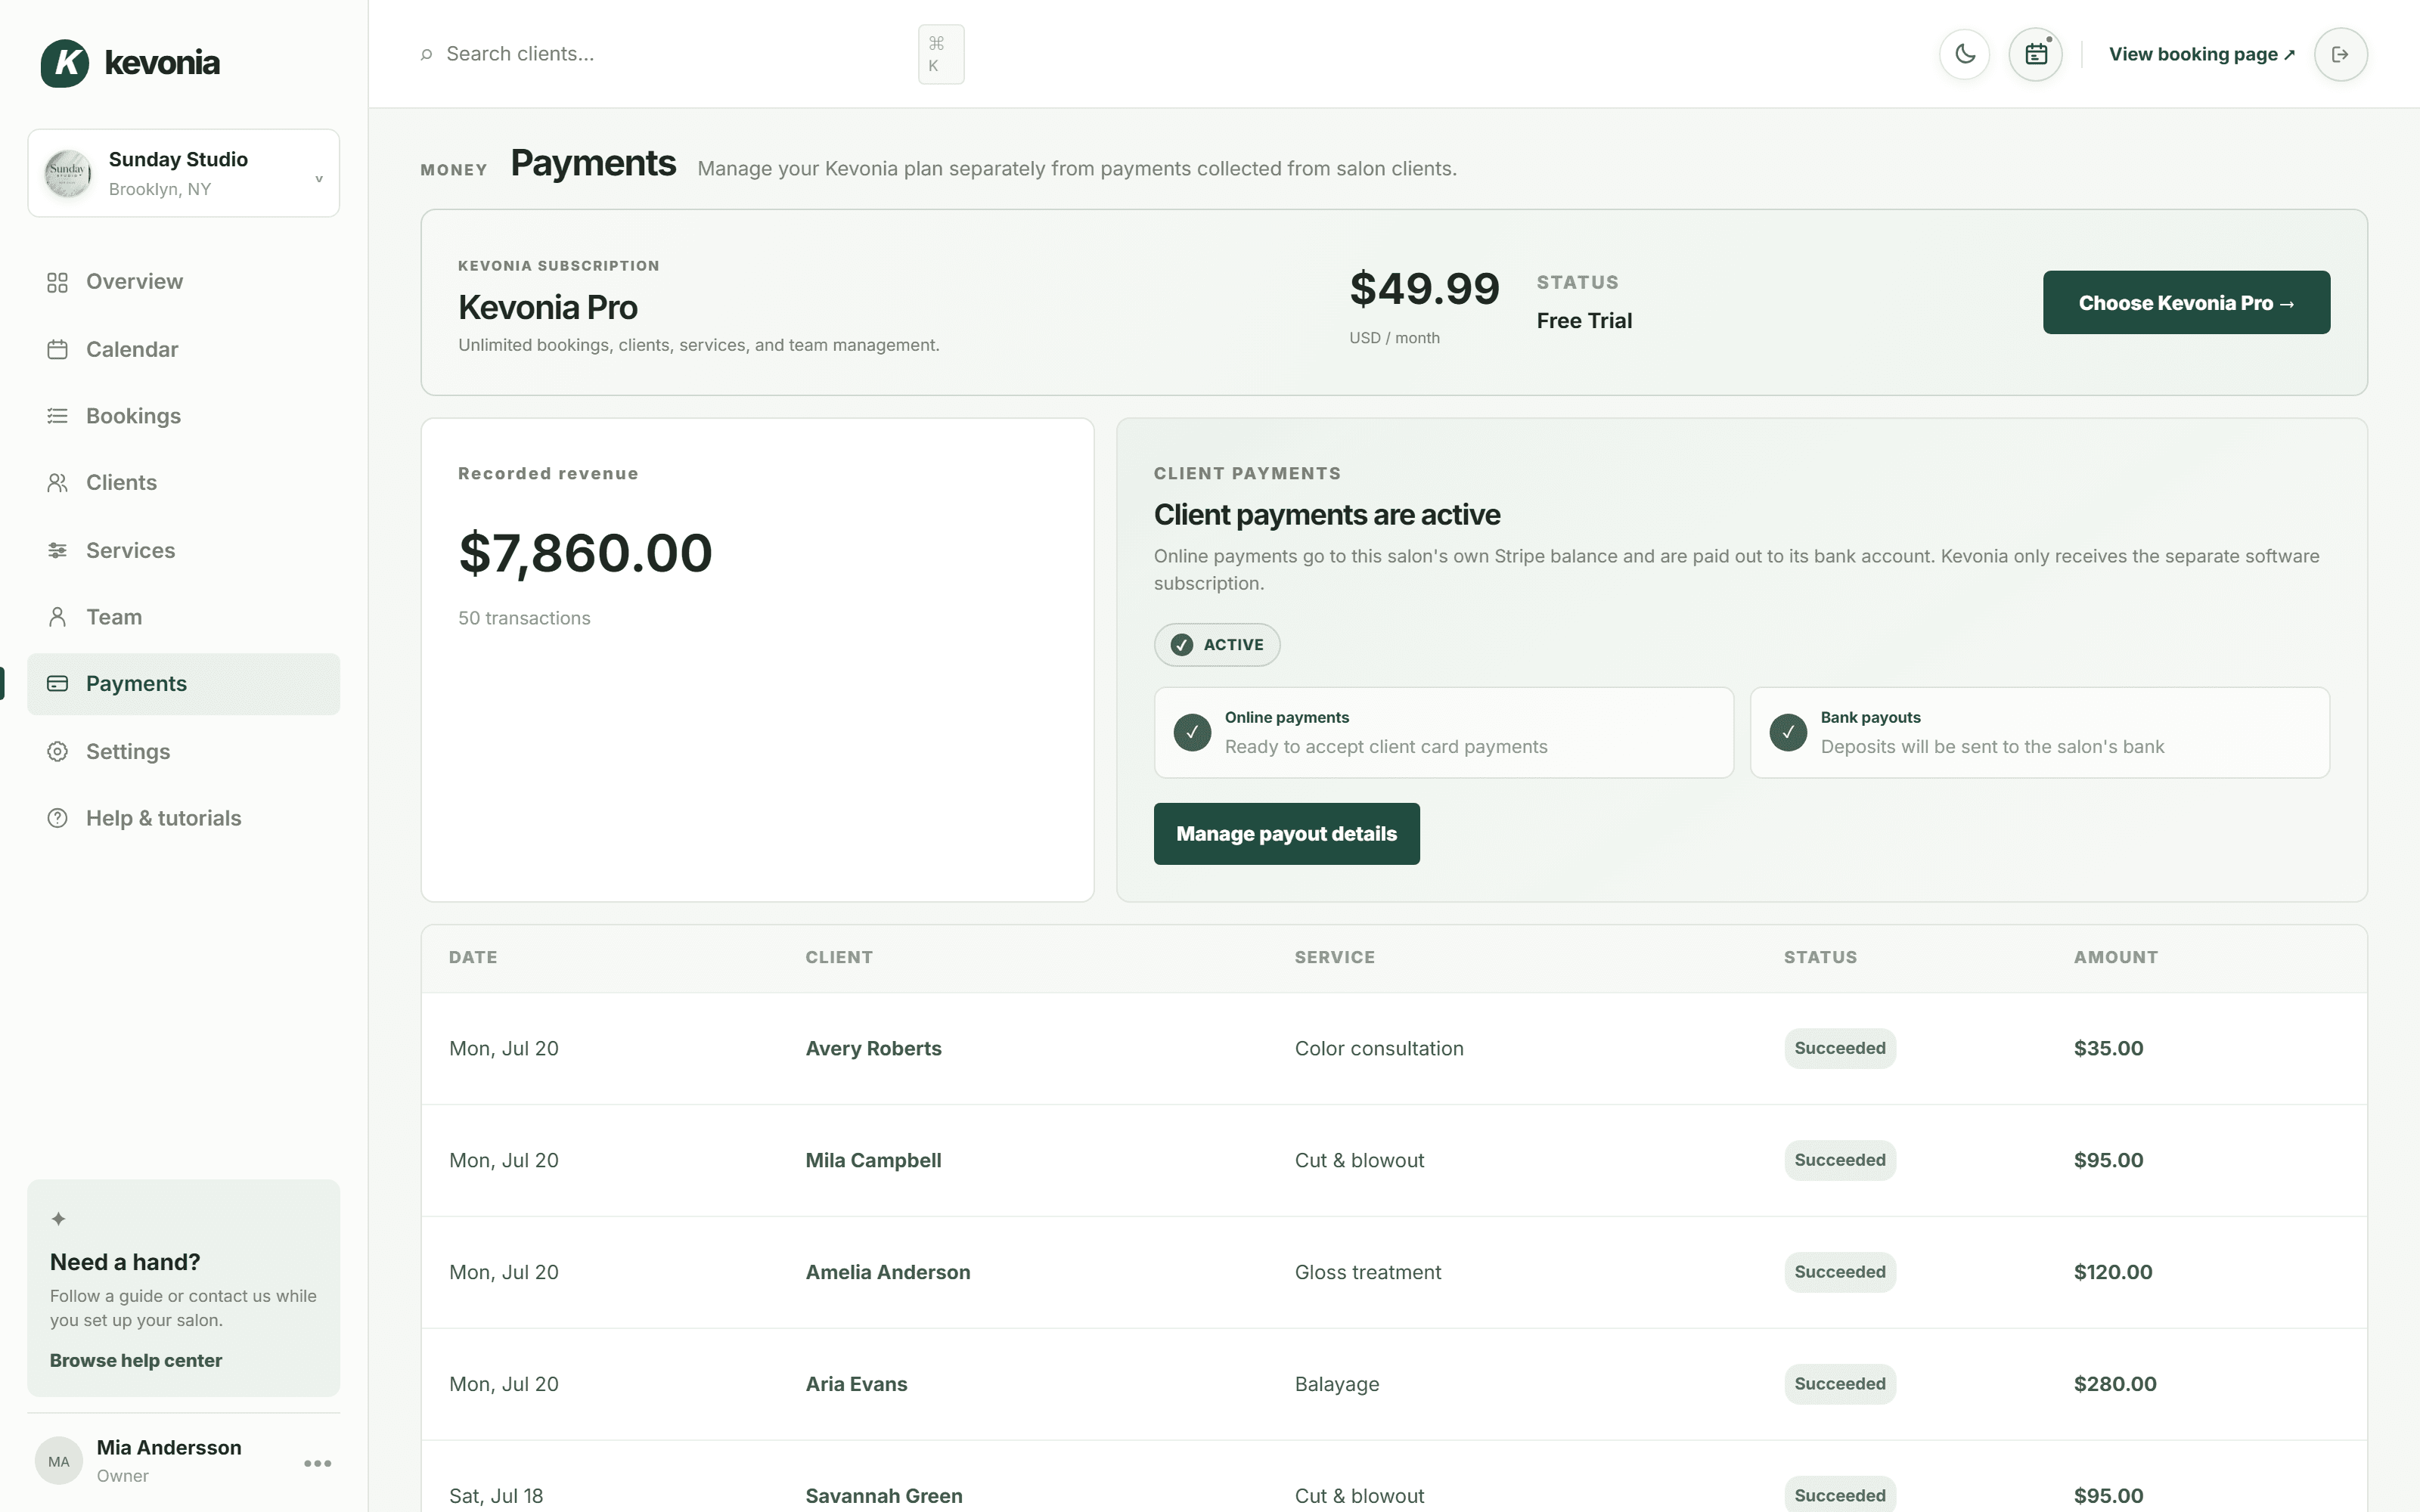
Kevonia Pro pays for the software. Client card payments belong to the salon and are paid to its connected Stripe account.
Payments shows the Kevonia plan, client revenue and the salon’s payout readiness.
01
Step 1
Use Manage payment method for the card used by the Kevonia Pro subscription.
02
Step 2
Complete Client payments setup so Stripe can verify the salon and bank account.
03
Step 3
When card payments and payouts are active, enable online payments in Settings.
04
Step 4
Use Manage payout details for bank information and Stripe payout settings.
Secure by designIdentity and bank details go directly to Stripe. Kevonia does not store this sensitive information.
The salon gets its own Stripe accountClient payments run through an account that belongs to the salon, not to Kevonia. Payout timing, Stripe's own fees and any disputed payment are settled there. Manage payout details opens Stripe's screens inside Kevonia.
08 · AVAILABILITY
Control when clients can book
Settings is the source of truth for your public profile and every bookable time clients see.
Business profileName, photo, contact details, address and description.
Booking rulesBooking window, notice, slot interval and payment options.
Opening hoursWeekly hours and any number of non-bookable breaks.
Temporary closuresWhole-salon vacations, holidays or renovations.
01
Step 1
Set how far ahead clients can book.
02
Step 2
Use minimum notice to prevent last-minute appointments.
03
Step 3
Add breaks for lunch, meetings or cleaning.
04
Step 4
Use Temporary closures when the entire salon is unavailable.
05
Step 5
Save settings, then preview the public page to confirm the result.
09 · CLIENT EXPERIENCE
Test the page your clients will use
Share your public URL on Instagram, Google Business Profile, your website, email and text messages.
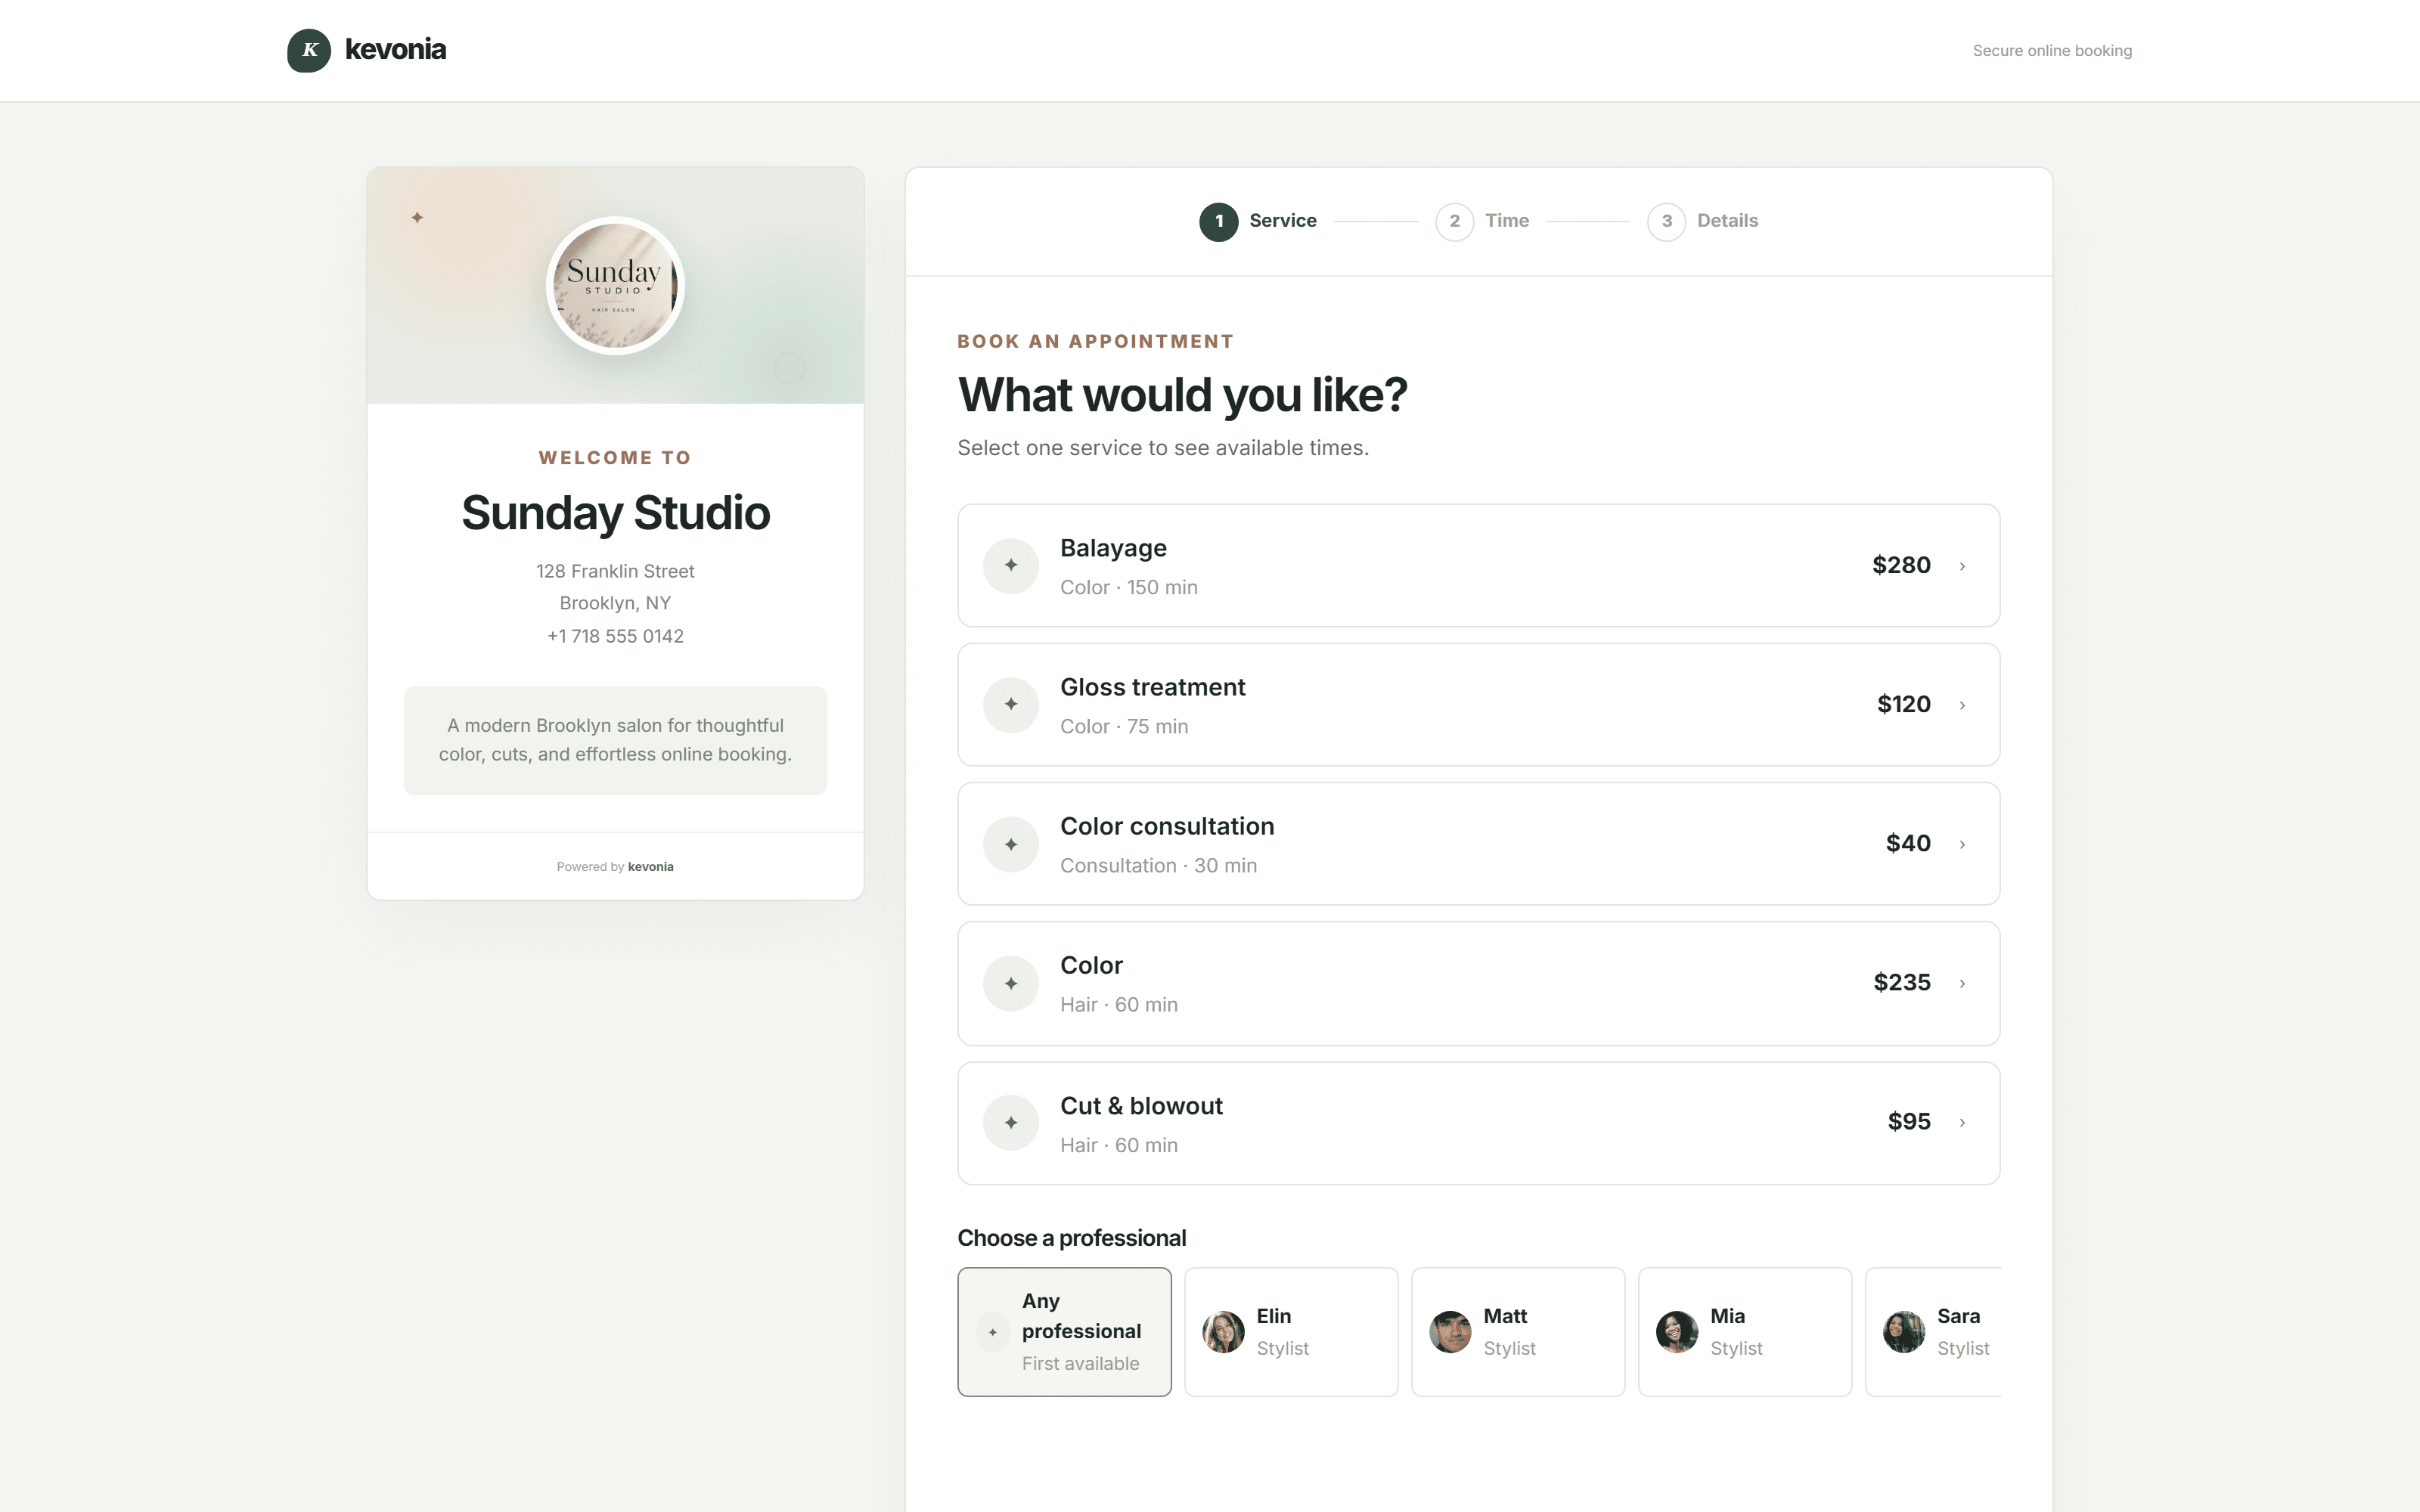
1. Choose a service and professional.
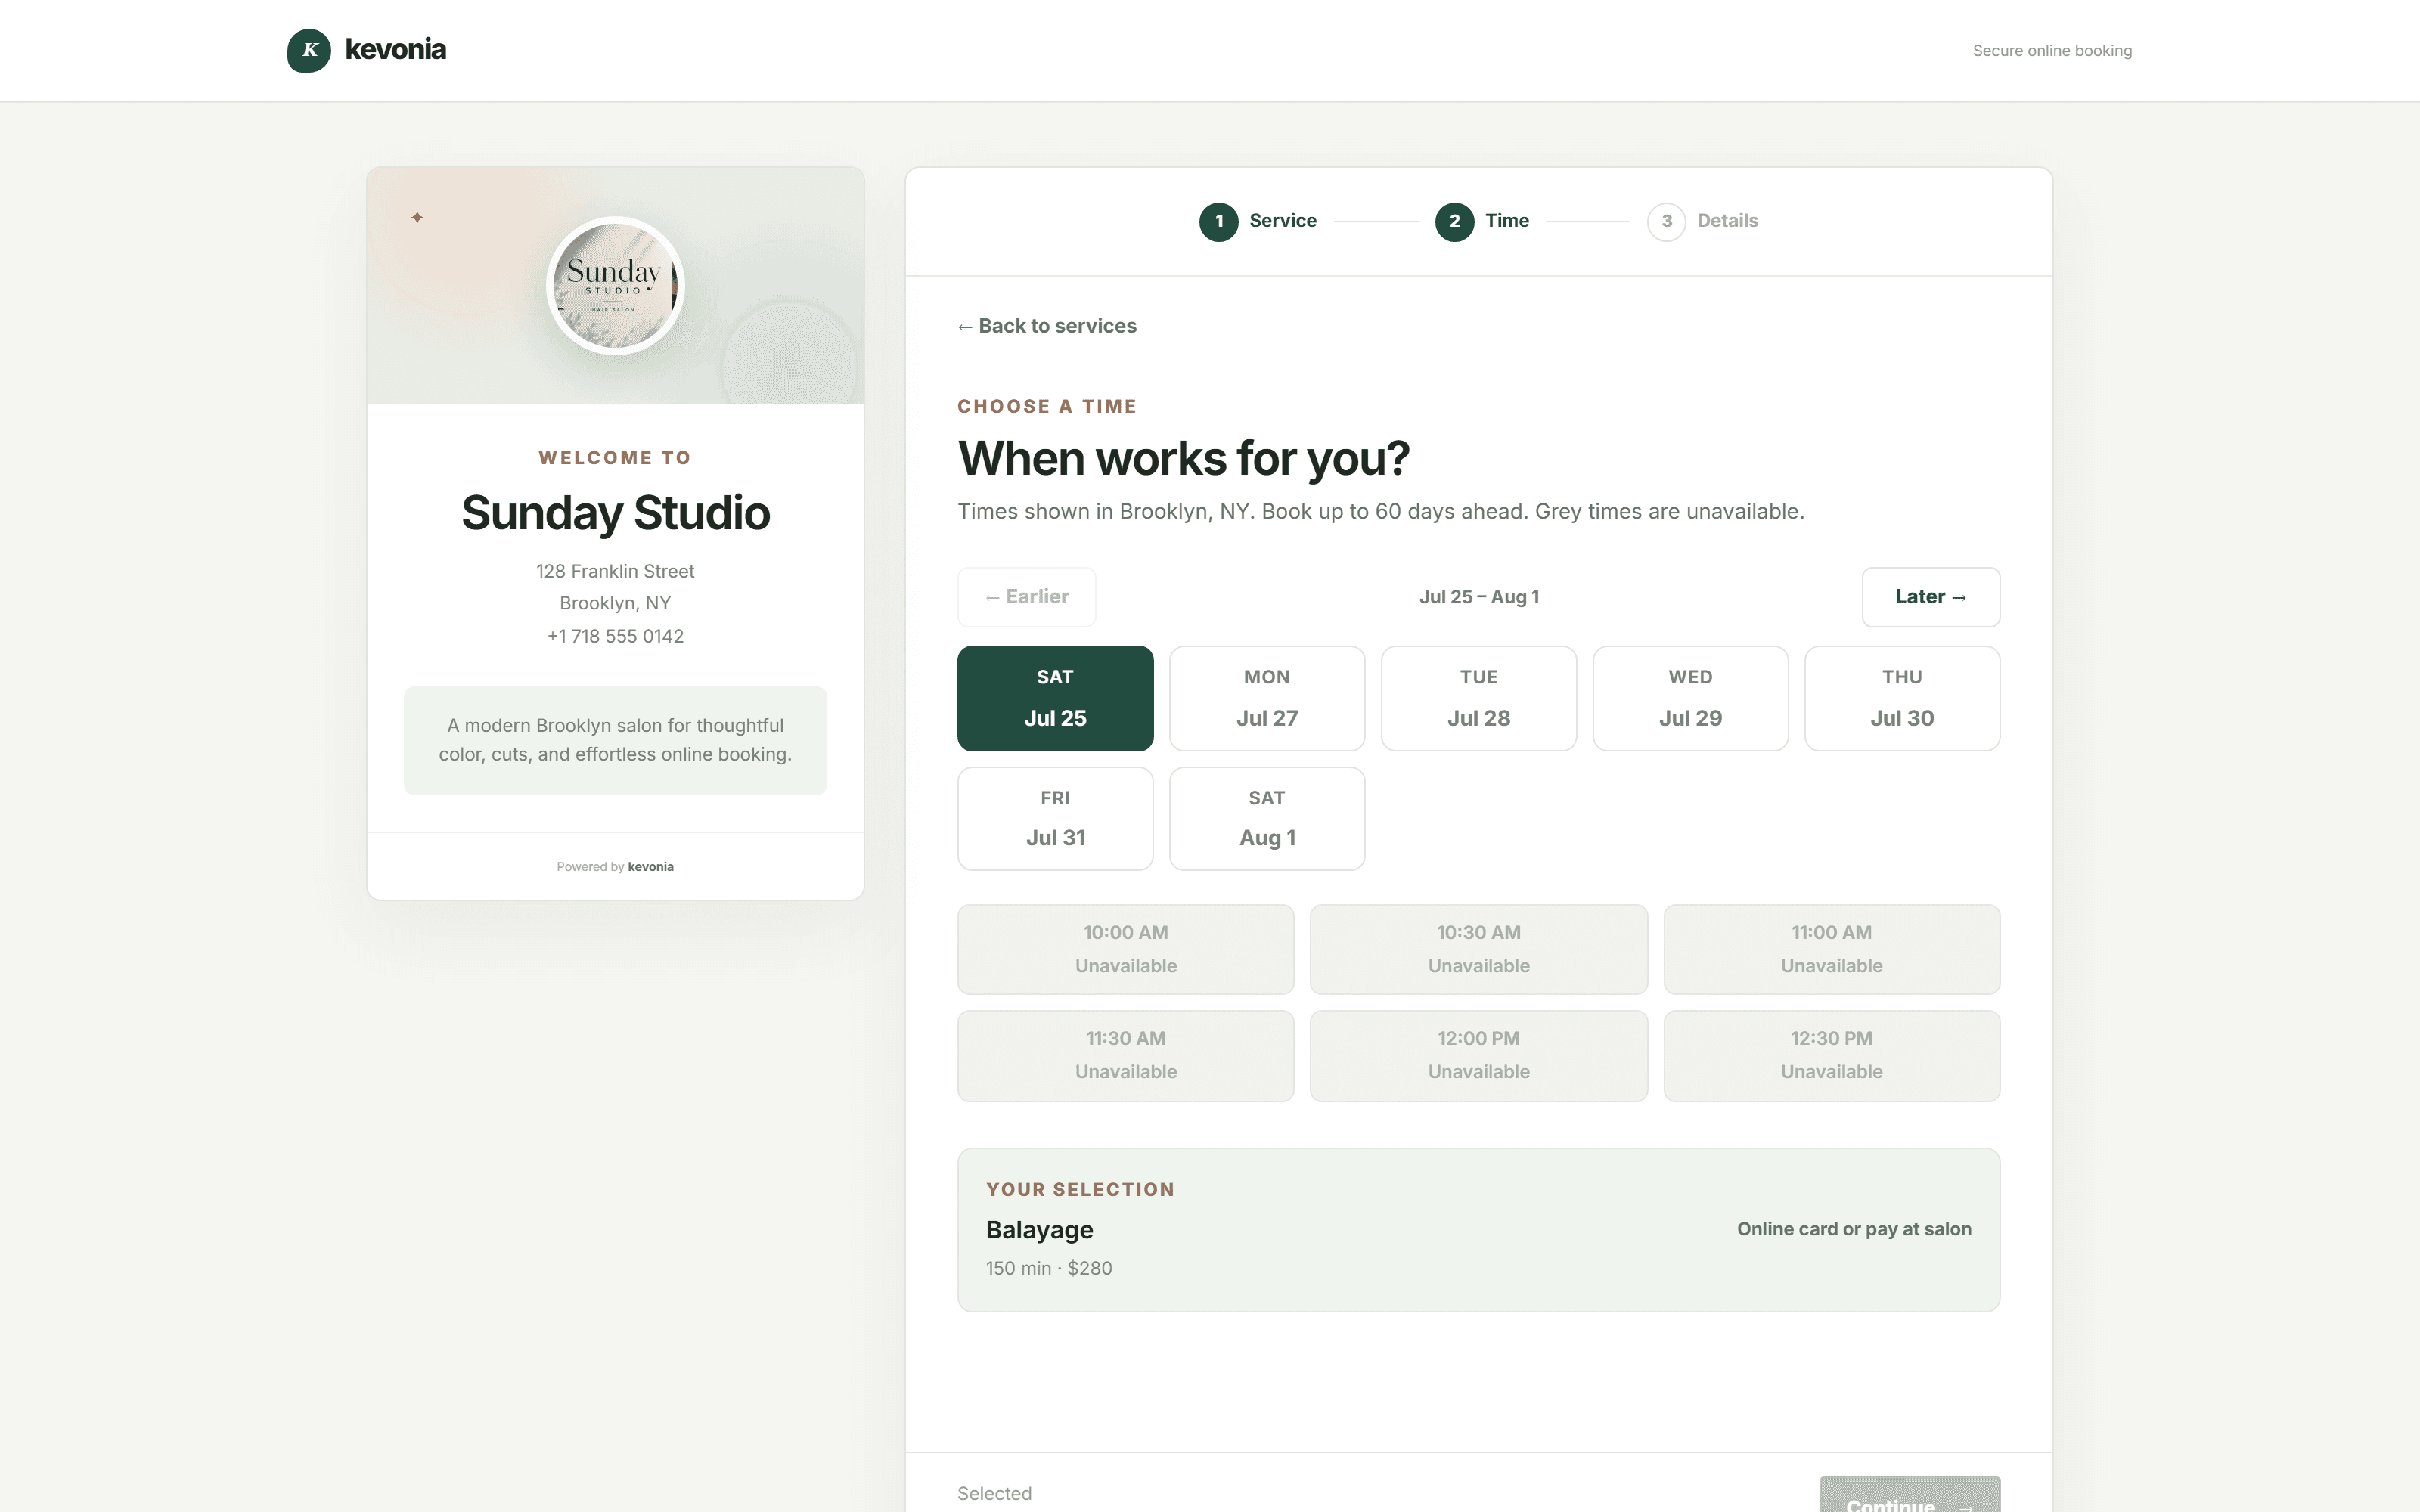
2. Choose from real available dates.
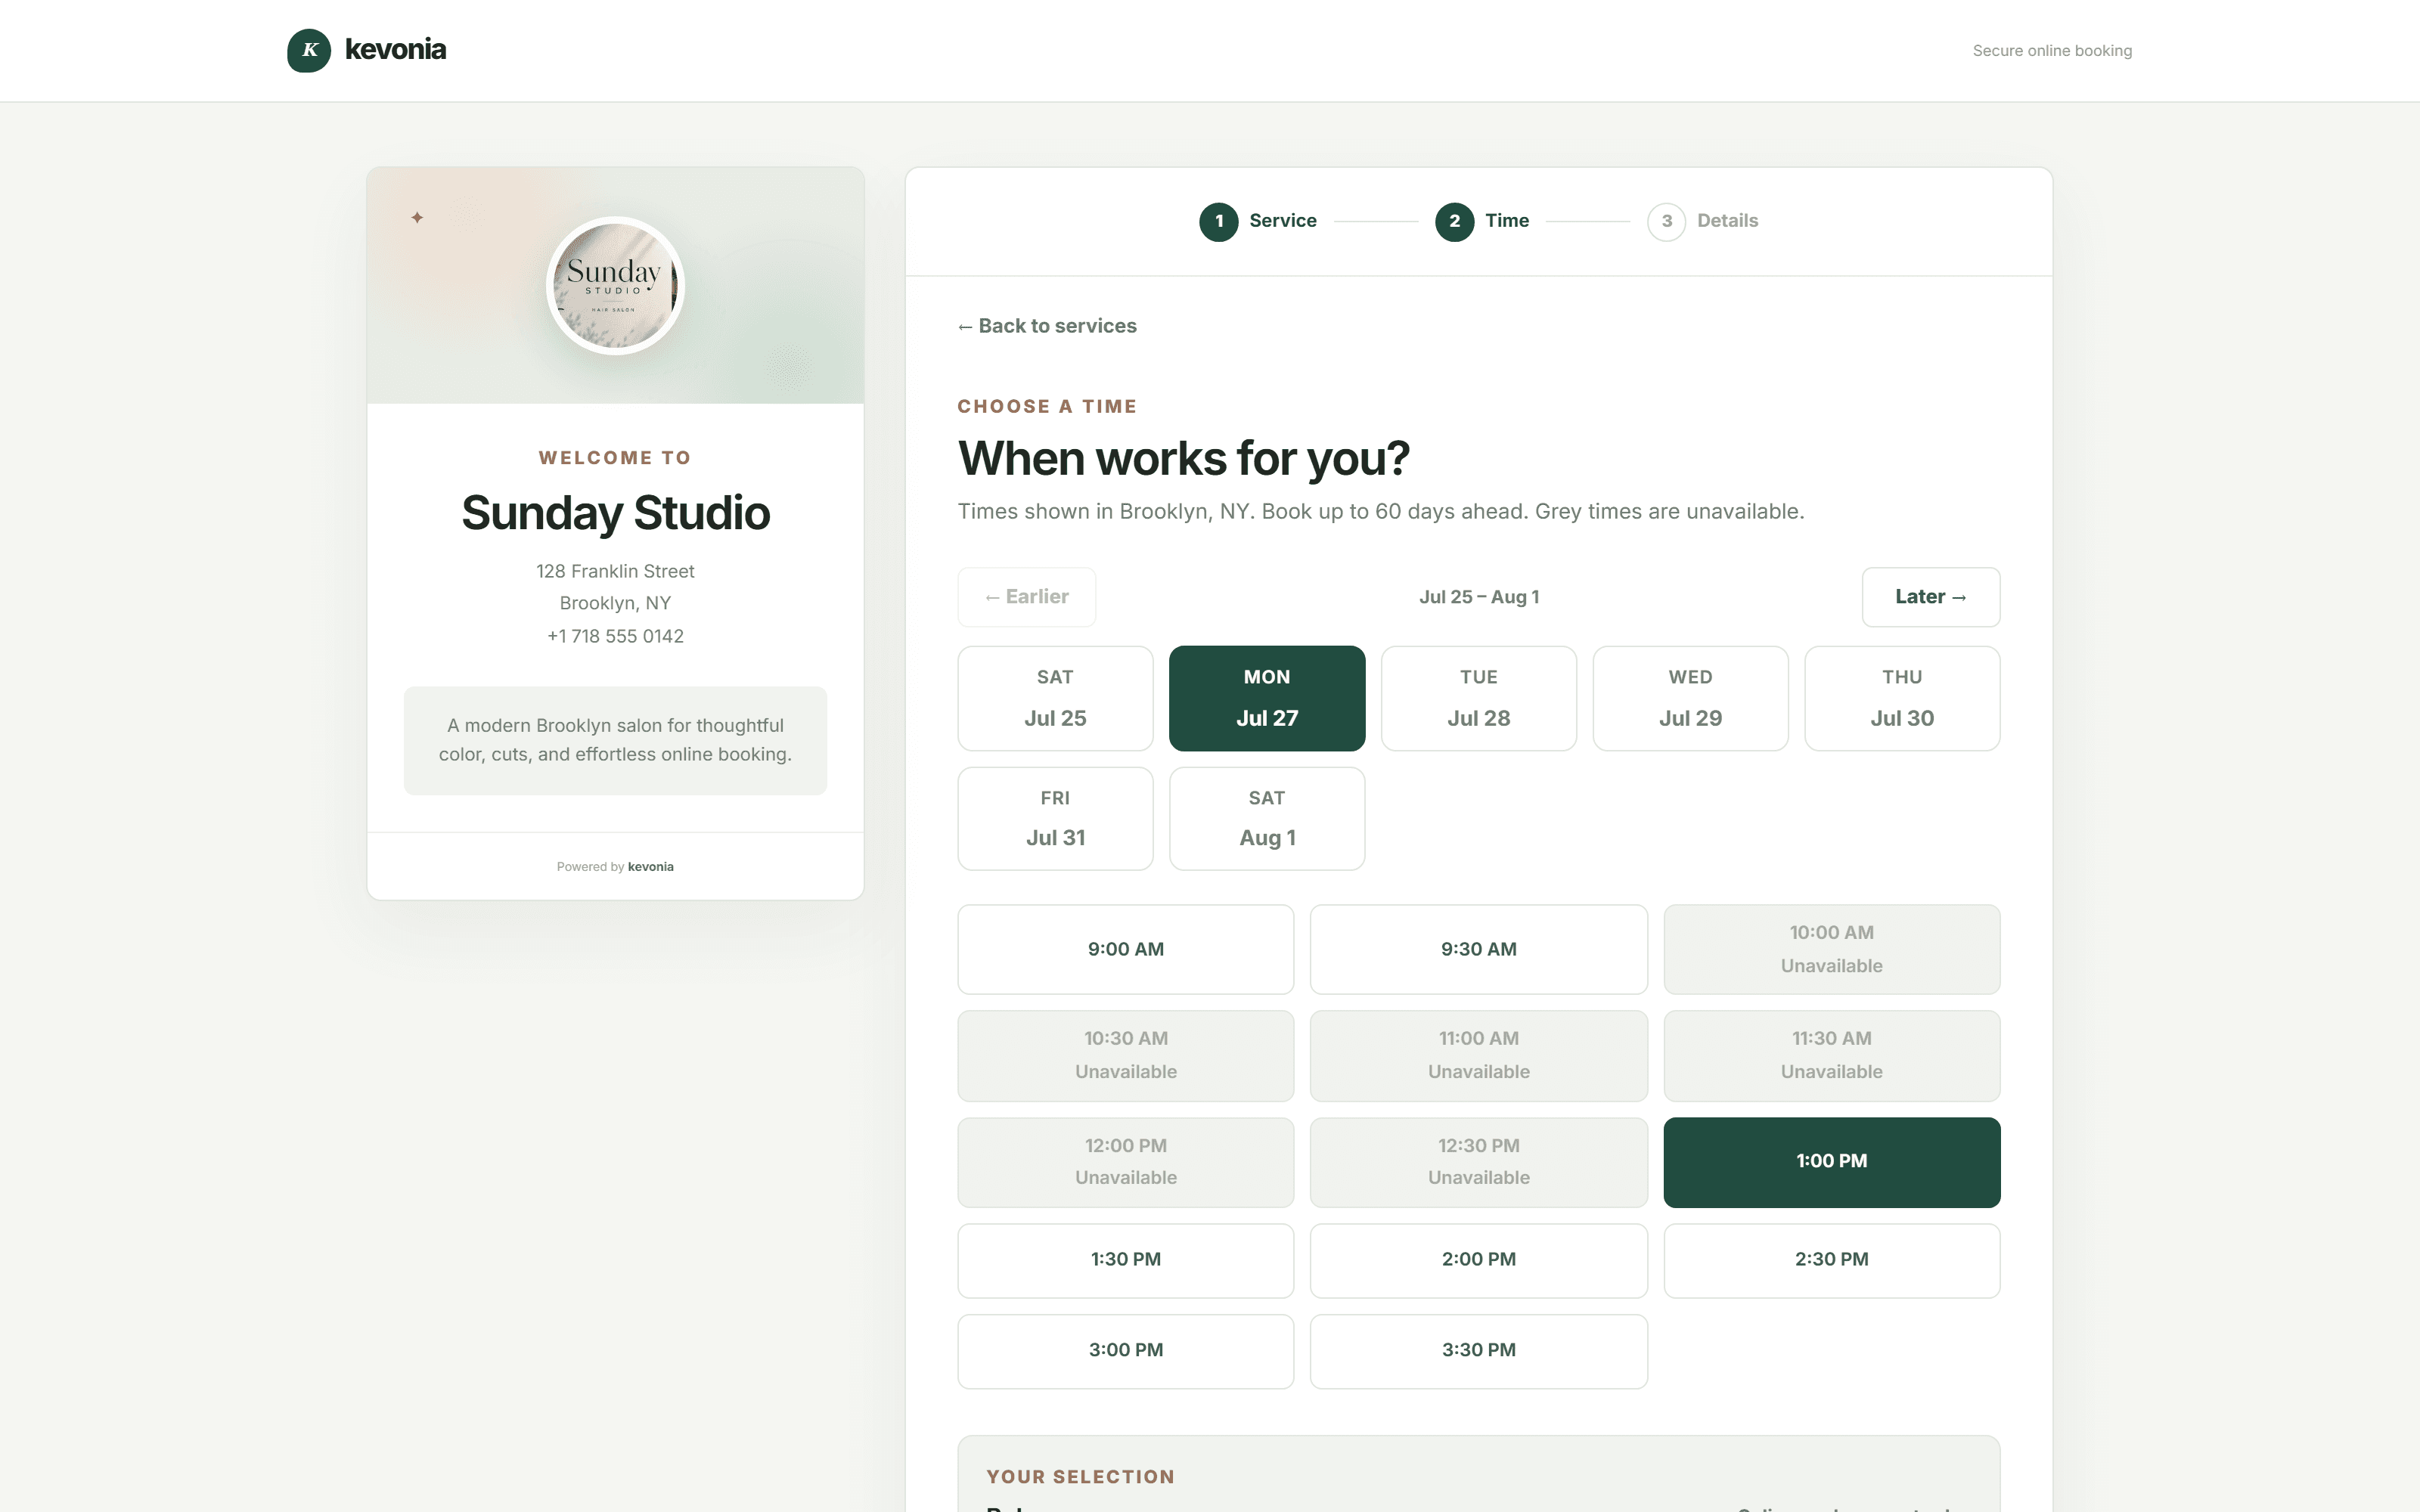
3. Select a time and confirm details.
READY TO CHECK YOUR SETUP?
Complete one test booking as if you were a client.